
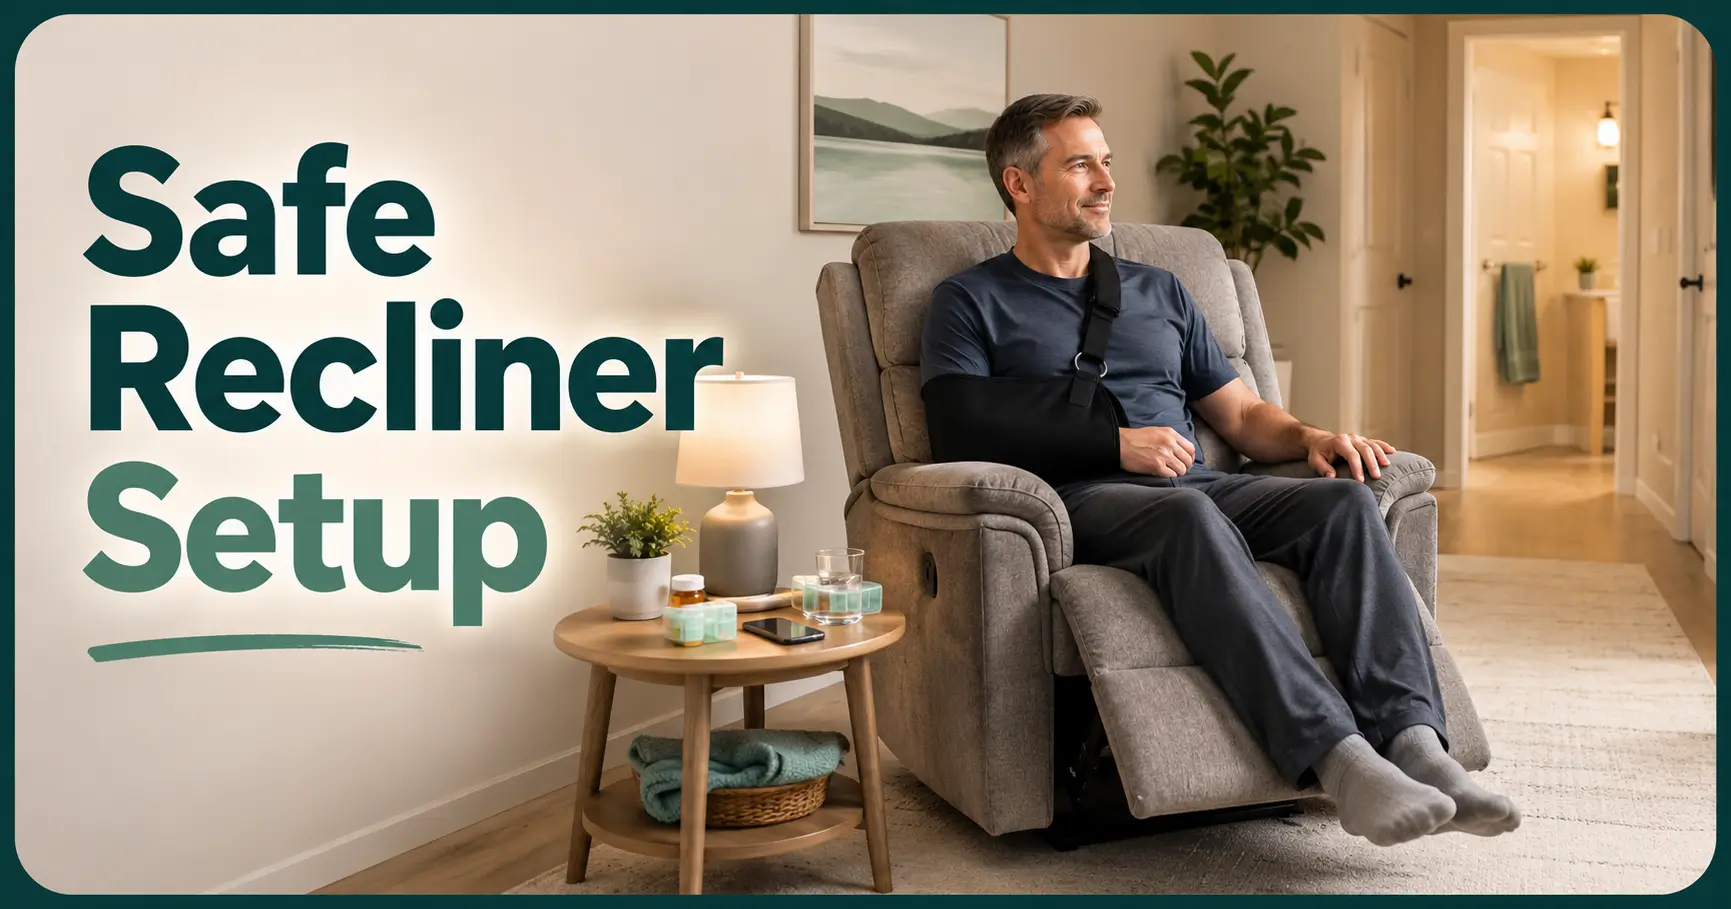
A room-first recovery guide
Recliner Placement After Shoulder Surgery:
A Safer Setup for the First Nights
After shoulder surgery, a recliner can become bedroom, command center, medication desk, and midnight refuge. The chair itself is only half the equation. Where it sits, how it opens, which side holds your essentials, and whether you can stand without using the operated arm may matter far more than upholstery or brand.
A setup that looks tidy in daylight can turn awkward at 2:14 a.m., when the footrest blocks the bathroom route, a charging cable snakes across the floor, and the phone is six inches beyond a safe reach. This guide helps you find those quiet problems before surgery, while moving a lamp is still easy.
You will learn how to measure clearance, choose a practical recline position, support the arm without changing the prescribed protocol, compare manual and power recliners, build a one-handed recovery station, and recognize when discomfort needs medical attention rather than another pillow.
The safest recliner is not the fanciest chair. It is the chair you can use without reaching, twisting, tripping, or improvising. 🪑
Snapshot
This guide is for shoulder-surgery patients and home caregivers preparing an elevated sleeping and daytime recovery area. It solves the practical room-layout problems that generic “sleep in a recliner” advice leaves unanswered. By the end, you can measure the space, arrange a safe reach zone, compare chair options, and run a complete recovery rehearsal.
Table of Contents
Before You Move Furniture, Confirm the Rules That Matter
A recliner can improve comfort after some shoulder procedures, particularly when lying flat pulls uncomfortably on the shoulder. It does not create a universal sleeping prescription. Rotator cuff repair, labral repair, fracture fixation, anatomic replacement, and reverse replacement can carry different restrictions for sling wear, arm position, transfers, and permitted movement.
Before arranging the room, read the written discharge plan and mark the instructions that affect furniture use. When the written plan and general internet advice disagree, the surgical team’s directions take priority.
Safety / Before You Act
This article provides general home-setup information. It cannot determine your safe sleeping position, sling schedule, transfer technique, medication plan, cold-therapy schedule, or permitted range of motion. Confirm those points with your surgeon, physical therapist, occupational therapist, or discharge nurse. Patients with balance problems, breathing conditions, significant weakness, or limited caregiver support may need an individual home-safety plan.
Five questions to answer before choosing a position
- Must the sling or immobilizer stay on while sleeping?
- Is an abduction pillow or other support required?
- Are there positions or shoulder movements I must avoid?
- May I use the nonoperative arm to push from the chair?
- How elevated should I remain, and for approximately how long?
Write the answers on one sheet and keep it beside the chair. Postoperative instructions can become surprisingly slippery after a long day, especially when pain medication, fatigue, and several well-meaning relatives join the committee.
Who may need more than a standard recliner setup
Ask for specific transfer or home-safety guidance when the patient has a history of falls, uses a cane or walker, cannot rise from a low seat, becomes dizzy when standing, has breathing trouble while reclined, or will recover without dependable assistance.
Patients expecting to manage the first days mostly alone may also benefit from a separate plan for meals, dressing, bathing, transportation, and emergency contacts. The guide to recovering alone after shoulder surgery can help identify gaps that furniture placement cannot solve.
Key takeaway: Fit the furniture to the postoperative protocol. Never change the sling, remove a prescribed support, or adopt a new sleeping position simply because the chair feels awkward.
Start With the Walking Path, Not the Recliner Angle
The first design question is not “Where will the chair look best?” It is “Can the patient reach the bathroom without stepping around anything?” Start at the recliner, walk the route slowly, and notice every rug edge, cord, pet bed, basket, narrow turn, and poorly lit doorway.
Home-preparation guidance commonly emphasizes clear floors, reachable supplies, secure lighting, and removal of loose cords and rugs. Those precautions become especially useful when a person is tired, medicated, moving one arm cautiously, or waking in darkness.
Map the shortest bathroom route
Choose a location on the same floor as the bathroom whenever practical. A slightly less picturesque corner may be a much better recovery station if it avoids stairs, tight doorways, or a journey through half the house.
- Remove throw rugs and loose mats from the route.
- Move small tables, baskets, floor plants, and pet supplies.
- Secure or reroute lamp and charging cords.
- Check that doors can open without striking the patient or chair.
- Add low-glare night lighting from recliner to bathroom.
- Keep footwear beside the chair without leaving it in the walking line.
For a room-by-room check, pair this setup with the bathroom setup after shoulder surgery guide. The transition into the bathroom is often where a good living-room plan develops a loose shoelace.
Leave a caregiver approach lane
A caregiver should be able to approach from the side or front without climbing over the footrest, squeezing behind the chair, or pulling on the patient’s arm. Leave room to manage blankets, cold-therapy equipment, clothing, and medications while keeping the surgical side protected.
Do not position the chair so tightly between a wall and table that assistance becomes a sideways puzzle. The patient may need more space on night one than during a calm daytime practice.
The five-zone recovery layout
Short Story: The footrest that became a gate
A family placed a comfortable recliner beside the television, stocked the table, and declared the room ready. Upright, the arrangement looked generous. Reclined, the footrest stretched across the only direct route to the hallway.
During the daytime rehearsal, the patient stood, stepped around the open footrest, and reached the bathroom without trouble. At night, wearing a sling and feeling groggy, that extra turn felt less like a detour and more like a negotiation.
The fix required no new equipment. They rotated the chair, shifted the table, and created a straight exit lane. They also added a small night-light near the doorway.
The lesson was simple: do not judge a recovery room from a standing photograph. Test it with the chair open, the lights low, the sling on, and the route in actual use.
The Three-Foot Detail Most Recliner Setups Miss
People often measure the chair while it is upright and forget that the backrest travels backward while the footrest travels forward. The true footprint can be dramatically larger than the furniture-store silhouette.
“Three feet” is a useful planning prompt, not a universal clearance requirement. Some wall-hugger designs need less rear space, while other chairs, swivel bases, handles, cords, or extended footrests need more. Follow the manufacturer’s operating-clearance instructions and measure the exact chair fully open.
Measure the chair fully open
- Place the recliner on the intended surface.
- Open the footrest and lower the backrest to the likely sleeping position.
- Measure the full distance from the furthest rear point to the footrest edge.
- Mark the footprint temporarily with painter’s tape.
- Walk around the marked area with the side table and lamp in place.
- Repeat with a caregiver standing nearby.
Protect the footrest’s landing zone
Keep shoes, blankets, cold-therapy hoses, baskets, pets, and charging cables out of the footrest path. A powered mechanism can move quietly enough to surprise a sleeping pet or catch a cord hidden under fabric.
Check the floor after someone has occupied the chair for an hour. Blankets migrate. Slippers wander. A recovery room is a small ecosystem with poor respect for opening measurements.
Check whether the chair walks across the floor
Operate the recliner several times while someone sits in it. Watch for sliding, rocking, or swiveling. A chair that creeps forward can gradually narrow the exit route or pull a power cord tight.
Use only floor-protection or anti-slip solutions appropriate for the chair and flooring. Avoid creating a raised edge that becomes a new trip hazard. Do not block vents, motors, hinges, or moving parts.
Key takeaway: Tape the fully open footprint on the floor. If the bathroom route, caregiver lane, or room exit crosses that outline, rotate or relocate the chair.
Why the Best Recliner Angle Is Not One Fixed Number
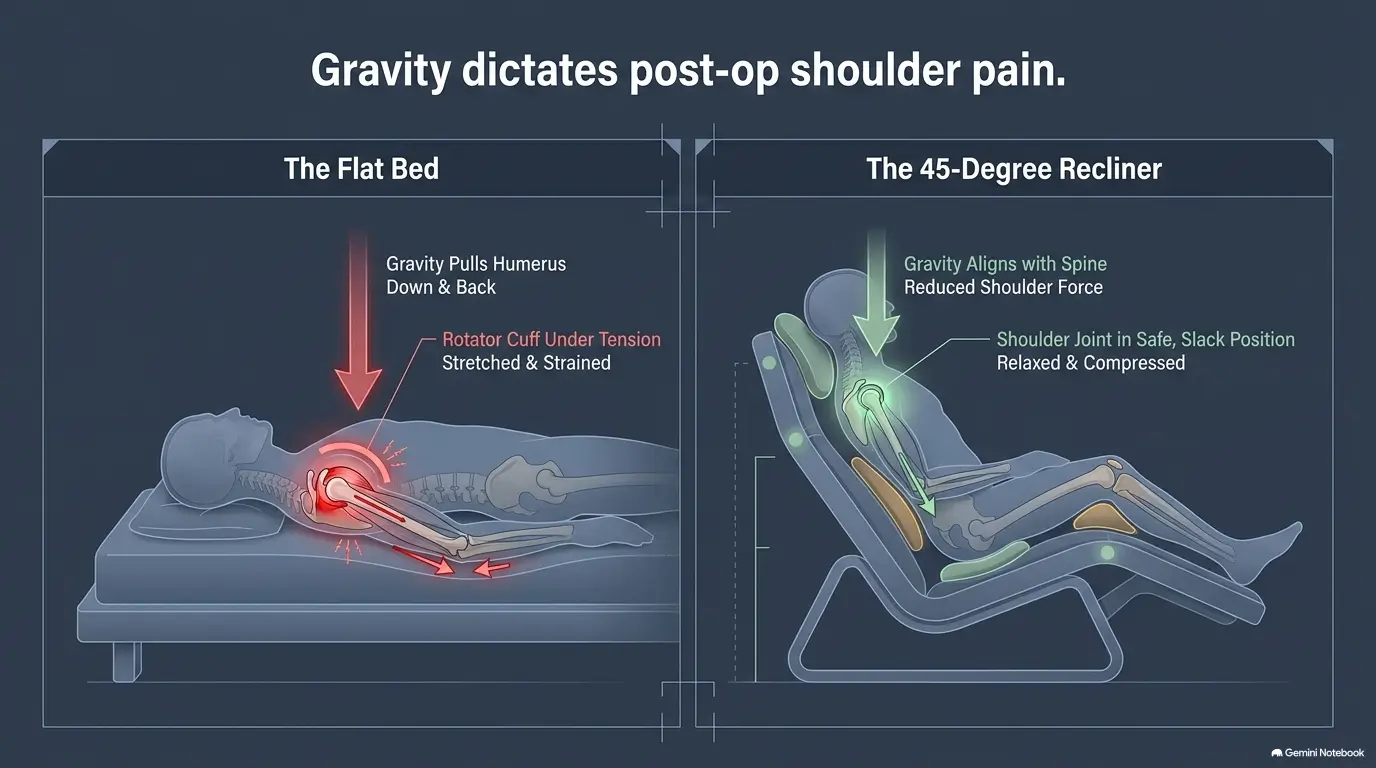
There is no single ideal recliner angle for every shoulder operation. Some people feel comfortable moderately elevated. Others need a more upright position, extra trunk support, or a prescribed arrangement linked to their specific repair.
The goal is not to chase a fashionable degree measurement. The goal is to follow the care plan while keeping the head, neck, trunk, sling, and supported arm in a stable position that does not invite sliding.
Match elevation to the written instructions
Ask whether the team wants you simply “elevated,” “semi-reclined,” or positioned in a more specific way. Clarify whether the guidance applies all night, only during the first several days, or until a follow-up appointment.
A recliner is one option, not the only option. Depending on the procedure and home layout, a properly arranged bed or approved wedge system may work. The comparison of recliner versus bed after shoulder surgery can help you evaluate both without treating either as automatically superior.
Keep the neck neutral, not folded toward the chest
Recliner headrests sometimes push the head forward, especially when several pillows are added behind the neck. Check that the chin is not pressed toward the chest and the head is not tilted sharply to one side.
Use a small amount of support to fill a gap rather than building a tall pillow tower. If neck pain, headache, arm symptoms, or breathing discomfort develops, stop experimenting and ask the care team for positioning guidance.
Stop sliding before adding another pillow
Sliding toward the footrest can pull clothing, alter sling position, round the neck, and make standing harder. First check the chair angle, seat depth, fabric slipperiness, clothing, and leg support.
Do not place loose cushions where they can fold, shift, or interfere with the reclining mechanism. A firm, secure seat adjustment may help in some situations, but altering seat height can also change transfer safety. Ask a physical or occupational therapist when the patient has difficulty staying positioned.
Key takeaway: A useful position supports the prescribed sling and arm arrangement while keeping the head neutral and the body from drifting toward the footrest.
Show me the nerdy details
Reclining changes several variables at once: trunk angle, hip position, head support, the direction gravity pulls the arm, and the amount of effort needed to stand. That is why copying another patient’s exact angle can fail even after a similar operation.
A practical setup test looks at the whole chain. Can the patient breathe comfortably, keep the sling positioned as prescribed, rest the forearm without shoulder hiking, avoid sliding, operate the controls safely, and stand without pushing through the operated arm? One weak link can undo an otherwise comfortable position.
The Side-Table Question That Changes the Whole Layout
The table should usually sit on the side the patient can use without crossing the body, rotating the trunk, or reaching with the operated arm. For many people, that is the nonoperative side. The correct side still depends on chair controls, hand dominance, room geometry, and the written movement restrictions.
Build a one-handed reach zone
Sit in the chair with the sling or a safe preoperative simulation in place. Keep the shoulders relaxed and use only the hand expected to be available. The items you can touch without leaning, twisting, or raising the elbow form the practical reach zone.
- Phone and charger connection
- Lamp control or reachable switch
- Water in an easy-open container
- Tissues and waste container
- Medication schedule and approved medications
- Television or fan control
- Glasses, hearing aids, or other daily essentials
- Surgeon’s office and emergency contact information
Place frequently handled objects between roughly waist and chest height while seated, provided that arrangement matches the patient’s restrictions. Avoid high shelves, deep drawers, and storage behind the chair.
Separate medications from drinks and snacks
Use distinct areas for medicines, beverages, and personal items. This reduces spills, wet labels, dropped tablets, and the bleary-eyed question of whether the pill beside the cracker was already taken.
Keep medicines in their labeled containers unless the care team or pharmacist has approved another system. A written log can be more reliable than memory during the first nights. The post-surgery pill-label guide offers additional organization ideas.
Create a charging and control point without crossing the floor
Run power and charging cords along a wall or behind stable furniture rather than across the walking route. Keep connections away from the chair mechanism, footrest, casters, and places where a caregiver may step.
Test every control with one usable hand. This includes the recliner control, lamp, phone, television, fan, heating control, and cold-therapy unit if prescribed. For more one-handed planning, see the guide to organizing remote controls after shoulder surgery.
Pillow Geometry: Support the Arm Without Rewriting the Protocol
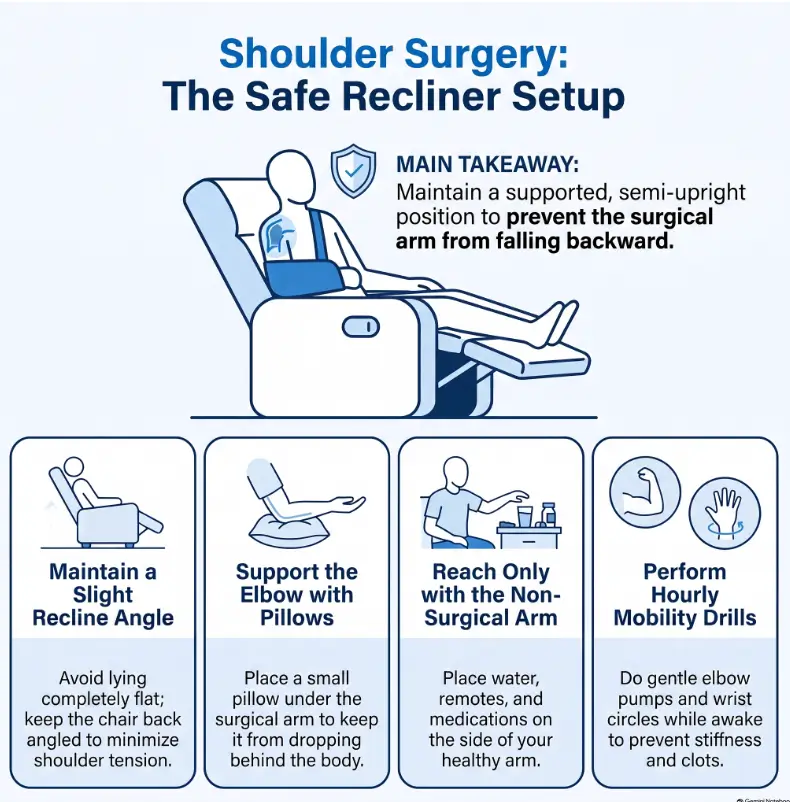
Pillows should fill unsupported gaps and help maintain the prescribed position. They should not force the arm into a new angle, lift the shoulder toward the ear, replace an ordered abduction pillow, or encourage removal of the sling.
Support the forearm and elbow without hiking the shoulder
When permitted by the care plan, a pillow may be used under the forearm or elbow area to prevent the arm from hanging uncomfortably. The exact position depends on the sling, surgical procedure, and instructions given at discharge.
Look at the shoulder line. If the supported side is pushed noticeably upward, the pillow may be too thick or poorly placed. If the elbow drops into a gap and pulls the sling out of position, more targeted support may be needed.
Fill gaps instead of padding every surface
More pillows do not automatically create more support. Too many can crowd the chair, shift during sleep, trap heat, push the neck forward, or make the patient feel wedged into a fabric nest with no graceful exit.
- Use the fewest pillows needed to maintain the approved position.
- Choose covers that do not slide easily against the chair.
- Keep pillow edges clear of controls and moving mechanisms.
- Recheck placement after reclining, not only while upright.
- Have the caregiver inspect the setup after the patient relaxes fully.
Plan for pillow migration overnight
Rehearse what happens when the patient shifts slightly, reaches for water, or changes the recline setting. A pillow that begins under the elbow may move toward the floor or press against the footrest mechanism.
Photograph the approved arrangement before bedtime so the patient or caregiver can rebuild it consistently. For bed-based alternatives, review the wedge pillow after surgery guide, then confirm the final configuration with the care team.
Entry and Exit: Test the Hardest Movement Before Surgery
A chair can feel excellent once you are settled and still be a poor recovery chair if standing requires a deep forward lean, a forceful push through both arms, or a tug on nearby furniture.
Shoulder-replacement guidance may specifically restrict pushing the body upward with the operated arm. Transfer instructions differ, so ask which arm support, leg position, and assistance method are allowed for your procedure.
Check seat height and depth
When seated upright, the patient should be able to place the feet securely and move toward standing without becoming trapped in a deep cushion. A very low or soft chair can require more trunk effort and more temptation to pull on the armrest.
Do not add an unstable stack of loose cushions to raise the seat. If height is the problem, ask whether a firm, secured cushion, lift-assist chair, or transfer training would be appropriate.
Test controls with the permitted hand
Manual recliners may use a side handle, pull lever, or body pressure. A handle on the surgical side can make an otherwise suitable chair impractical. Some manual footrests also require force to close.
Power recliners may offer easier adjustments, but the control must remain reachable and the cord must stay protected. Confirm how the chair returns upright during a power interruption and whether a battery backup is built in, optional, or unavailable.
Practice the complete transfer sequence
- Approach the chair without turning sharply into the surgical side.
- Back up until the legs touch the seat, if that is the taught method.
- Sit using the legs and only the arm support allowed by the care team.
- Operate the footrest and backrest with the permitted hand.
- Return the chair fully upright before standing.
- Place both feet securely and stand using the instructed technique.
- Pause for dizziness before beginning to walk.
If any step causes hesitation, pain, loss of balance, or use of the operated arm, stop. A physical or occupational therapist can help adapt the transfer method or recommend a different chair.
Compare Recliner Setups Before Spending Money
Many patients can create a workable setup with a chair they already own. Buying or renting becomes more reasonable when the existing recliner is too low, difficult to operate one-handed, unstable, painfully deep, or positioned where no safe route is possible.
Do not shop by the phrase “best recliner after shoulder surgery” alone. The useful comparison is functional: transfers, control location, open footprint, firmness, power reliability, delivery timing, and return or rental terms.
Good, better, and best-fit setup options
| Setup level | What it may include | Best for | What to verify |
|---|---|---|---|
| Good: adapt what you own | Existing stable recliner, clear route, side table, lamp, approved pillows | Patients who can transfer and operate the chair safely | Seat height, handle side, full-open clearance, chair movement |
| Better: targeted upgrades | More suitable side table, secured lighting, cord management, firm support, backup charging | Homes with small layout problems rather than a chair problem | That each addition reduces reaching rather than adding clutter |
| Best fit: rent or buy a different chair | Power adjustment, easier controls, supportive seat, suitable height, optional lift assistance | Patients who cannot safely use the current chair | Transfer approval, dimensions, backup plan, delivery, sanitation, return terms |
Manual versus power recliner
| Feature | Manual recliner | Power recliner |
|---|---|---|
| Adjustment | May require pulling, pushing, or body pressure | Usually controlled by a switch or handset |
| One-handed use | Depends heavily on handle side and closing force | Often easier if the control is on the usable side |
| Power outage | Normally remains operable without electricity | May become difficult to return upright without backup power |
| Cords | Usually fewer floor-cord concerns | Requires careful power-cord placement |
| Fine positioning | May offer fewer stopping positions | Often allows smaller position changes |
| Best choice | The one the patient can operate safely | The one the patient can operate safely |
What to ask before renting or buying
- What is the seat height, depth, and width?
- What are the full-open dimensions?
- Where are the controls located?
- Can the footrest return upright without using the surgical arm?
- Does a lift feature match the therapist’s transfer guidance?
- Is battery backup included or available?
- Will delivery include placement and an operating demonstration?
- What happens if the chair does not fit the room or patient?
- For rentals, how is the chair cleaned and maintained?
- Who handles repair if the mechanism fails during recovery?
A paid upgrade is worthwhile only when it solves a documented problem. Spending more for massage modes, cupholders, or extra electronics does little if the seat is too deep or the control sits beside the immobilized arm.
Build a Night-One Recovery Station Without Creating Clutter
The recovery station should hold what the patient is likely to need between settling into the chair and safely standing again. It should not resemble a convenience store after a minor earthquake.
The night-one checklist
- Charged phone with volume turned up
- Surgeon’s office number and after-hours instructions
- Local emergency contact
- Water in an easy-open container
- Approved medications in labeled containers
- Written medication log and pen
- Tissues and small waste container
- Glasses, hearing aids, or dental items
- Cold-therapy supplies prepared exactly as instructed
- Light blanket that does not require overhead pulling
- Stable footwear beside, not beneath, the footrest
- Clear path to the bathroom
Clothing matters too. A loose front-opening top may be easier than something pulled overhead, depending on the dressing instructions. The guide to shoulder-surgery shirts explains what features are worth comparing before buying specialized clothing.
Stage cold therapy without building a hose maze
Follow the discharge instructions for timing, skin protection, dressing care, and device use. Do not sleep with a cold-therapy device running unless the care team and device instructions specifically allow it.
Route hoses away from the walking path and reclining mechanism. Place the unit on a stable surface where it cannot tip, leak, or require the patient to reach toward the floor.
Create a power, communication, and caregiver backup plan
Charge the phone before bedtime and keep a power bank within reach if available. For a power recliner, learn the emergency-return method before surgery and keep any backup battery maintained according to its instructions.
Caregivers can use a simple shared message thread for medication times, meals, symptoms, and handoffs. The caregiver group-chat guide offers a structure that keeps useful information from sinking beneath cheerful stickers and “How are you feeling?” messages.
Key takeaway: Keep essentials reachable, but preserve one empty landing area on the table. That clear patch is where the patient can safely set down the phone, medication log, or water without shuffling ten other objects.
When the Recliner Stops Helping and the Surgeon Should Hear About It
Normal postoperative discomfort varies, and a furniture adjustment may help with pressure, neck position, or sliding. It should not be used to explain away symptoms that may need medical review.
Contact the surgical team according to the discharge instructions for worsening or uncontrolled pain, fever or chills, increasing redness or swelling, bleeding or drainage, and new numbness or tingling. Changes in hand color or temperature, marked swelling, sudden weakness, or a sense that a replaced shoulder has shifted also deserve prompt attention.
Symptoms that should trigger a call
- Pain that remains uncontrolled despite using prescribed medication as directed
- New or rapidly increasing swelling in the arm or hand
- Numbness, tingling, weakness, or loss of hand function
- Fingers that become unusually cool, pale, blue, purple, or dark
- Increasing redness, warmth, drainage, bleeding, or wound opening
- Fever, chills, or feeling unexpectedly unwell
- Sudden sharp pain or a new feeling of instability after replacement surgery
- A fall, collision, or forceful movement involving the operated shoulder
Symptoms that should not wait for a furniture adjustment
Chest pain, severe shortness of breath, fainting, confusion, or another potentially life-threatening symptom requires emergency evaluation. Use local emergency services rather than waiting for a routine callback.
Document what changed before you call
Note when the symptom began, what the patient was doing, whether medication helped, and whether swelling, color, sensation, temperature, drainage, or function changed. Follow the surgical team’s instructions about photographs and wound handling.
Night pain is common enough to be frustrating, but patterns still matter. The guide to night pain after surgery can help you organize observations for a more useful conversation with the clinician.

Recliner Placement FAQ
Should the recliner go in the bedroom or living room?
Choose the room with the safest bathroom route, best lighting, adequate full-open clearance, manageable noise, and easiest caregiver access. A bedroom is not automatically safer, and a living room is not automatically too exposed. Test both locations using the actual chair dimensions and nighttime route.
How far should a recliner be from the wall after shoulder surgery?
Use the chair manufacturer’s required clearance rather than a universal number. Fully recline the chair, measure the rear movement, and leave enough space to prevent wall contact, cord pinching, and blocked caregiver access. Wall-hugger recliners may need less rear clearance but still require a safe footrest zone.
Which side should the table be on after right-shoulder surgery?
The left side is often easier because it allows use of the nonoperative hand, but room layout, chair controls, hand dominance, and surgical restrictions may change the answer. Sit in the chair and test every item without reaching across the body or leaning toward the surgical side.
Can I sleep completely upright after rotator cuff surgery?
Some patients are more comfortable upright or semi-reclined, but the safe position should come from the surgeon’s instructions. Completely upright can create neck strain or sliding for some people. Ask how elevated you should be and how the sling and forearm should be supported.
Should I wear my sling while sleeping in the recliner?
Wear it exactly as directed. Some procedures require nighttime sling or immobilizer use, while instructions can differ after other operations. Do not remove or loosen it merely to fit the chair. Ask the team to check the recliner position if the prescribed device feels incompatible.
How do I keep from sliding down during the night?
Check whether the chair is reclined too far, the seat is excessively deep, the fabric or clothing is slippery, or the headrest is pushing the body forward. Use only stable supports that do not interfere with the mechanism or alter the prescribed shoulder position. Persistent sliding may warrant therapist guidance or a different chair.
Is a manual or power recliner better after shoulder surgery?
Neither type is universally better. A manual chair may avoid power-outage concerns but require more force. A power recliner may allow easier, finer adjustments but introduces cords and possible outage problems. Choose based on safe one-handed operation, transfer height, stability, and room fit.
When can I stop sleeping in the recliner?
Ask the surgical team. The answer depends on the procedure, healing stage, pain, sling requirements, and ability to enter and leave a bed without prohibited movement. Do not use a calendar from another patient as a substitute for your own postoperative plan.
Run This 15-Minute Recovery Rehearsal
The room is not finished when the pillows look symmetrical. It is finished when the patient can complete the essential sequence using only movements allowed by the care team.
The complete test
- Put on the sling or use the care team’s approved preoperative simulation.
- Approach and sit in the recliner without using the future surgical arm.
- Operate the chair with the hand that will be available.
- Recline and check the neck, elbow, forearm, sling, and pillow positions.
- Reach the phone, lamp, water, medication log, and chair control.
- Return the chair upright and stand using the approved method.
- Walk to the bathroom with the lights set for nighttime.
- Return and repeat the sequence while a caregiver observes silently.
Anything that causes reaching, twisting, tripping, forceful pushing, uncertainty, or a blocked exit should be moved now. Photograph the final layout, including the side table and approved pillow placement, so it can be restored after cleaning or daytime use.
One useful action to take today
Open the recliner fully and place painter’s tape around its complete footprint. Then walk from the chair to the bathroom and back with one arm held against your body. That small rehearsal exposes most layout mistakes faster than an afternoon of online shopping.
The final check
A good recovery station feels almost uneventful. The route is obvious, the controls are reachable, the chair opens without swallowing the room, and the patient does not have to invent a movement at midnight. Quiet competence is the goal.
Last reviewed: 2026-09