
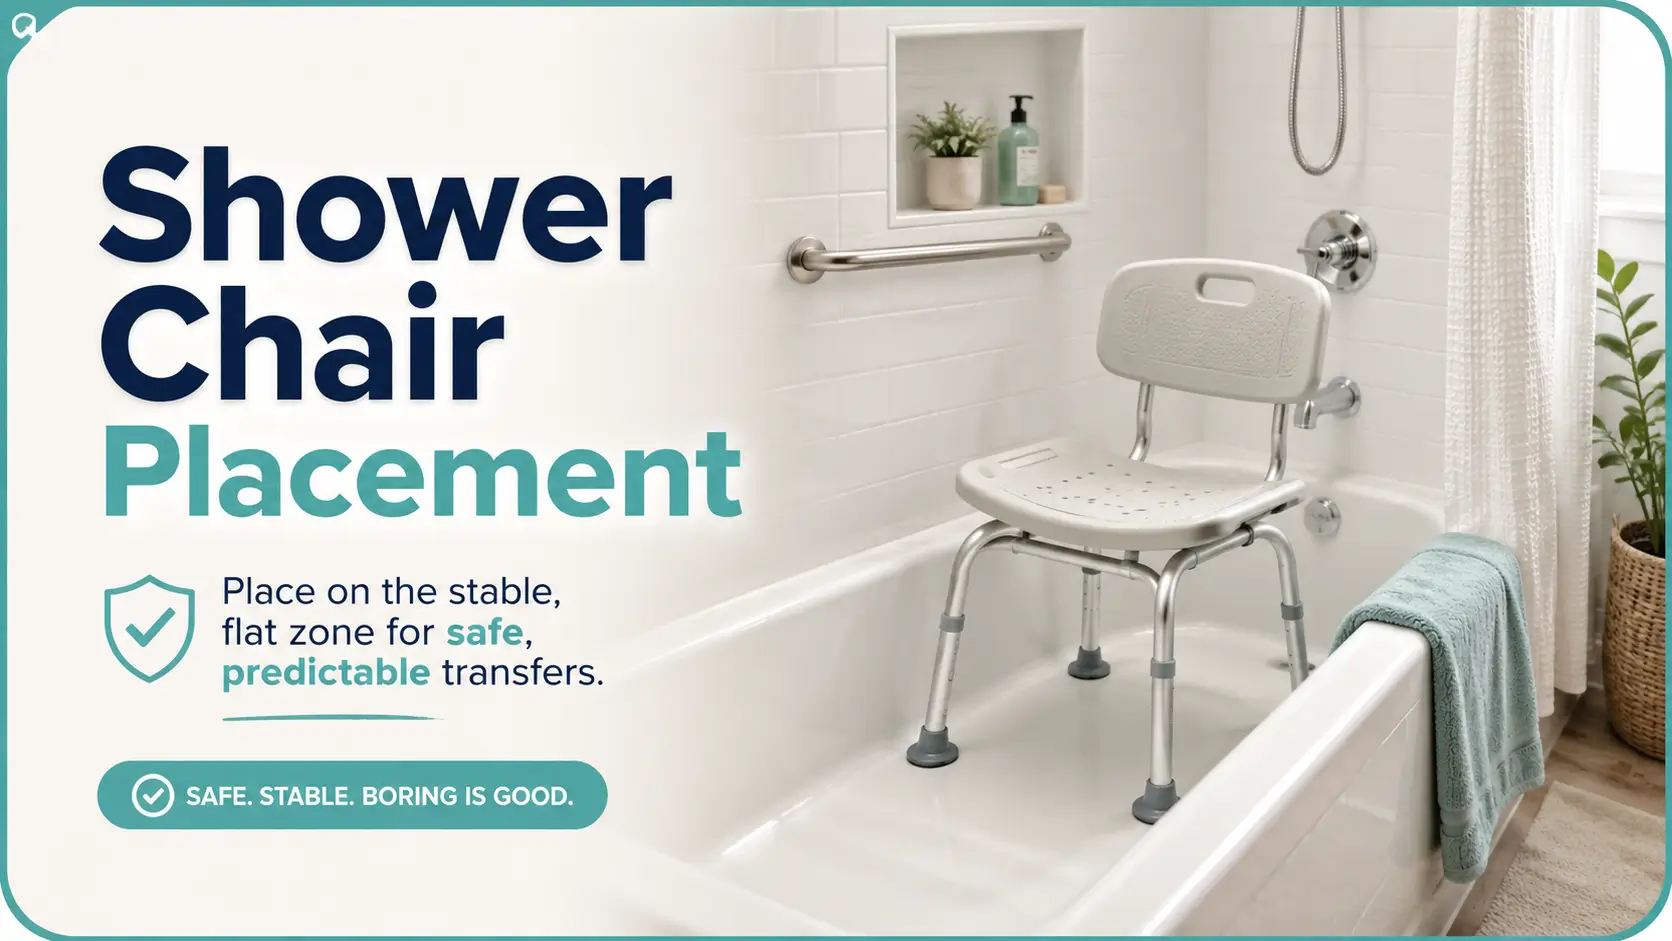
Narrow-Tub Safety Guide
Where to Place a Shower Chair
in a Narrow Tub Safely
A shower chair can make bathing calmer, less tiring, and more private. Yet in a narrow bathtub, moving the chair a few inches can change the entire transfer. One position shortens the step and gives both feet room to stand. Another quietly parks a chair leg on the tub’s rising curve.
The safest location is not automatically the middle of the tub or the spot directly beneath the showerhead. It is the position where every rubber foot is fully supported, the user can sit without shuffling or twisting, and faucet controls, doors, curtains, drains, and shower hoses stay out of the movement path.
This guide walks through that decision in the order it actually happens: entering, turning, sitting, bathing, standing, and exiting. It also explains when a standard shower chair is enough, when a transfer bench deserves a closer look, and when the tub itself may be the wrong shape for either.
Place
Find the tub’s genuinely flat four-foot zone.
Test
Check the full transfer, not just the empty chair.
Upgrade
Know when a bench or professional assessment is safer.
The goal is not a perfectly centered chair. It is a boringly predictable transfer. 🚿
Snapshot
Who this is for: Adults using a narrow bathtub, family caregivers, older homeowners, and people preparing a bathroom for surgery recovery. What it solves: Uncertainty about where and how to orient a shower chair. What you can do next: Identify a stable footprint, rehearse the transfer, and decide whether the current chair is suitable.
Table of Contents

Before You Move the Chair: What This Guide Cannot See
This article provides general home-safety guidance. It cannot assess the user’s balance, weight-bearing restrictions, cognition, dizziness, medication effects, surgical precautions, tub construction, or the specifications of a particular shower chair.
The chair manufacturer’s instructions control. Check the stated user-weight limit, approved surfaces, required leg spacing, rubber-tip or suction-foot requirements, and any warnings about textured tubs. Do not alter the legs, drill the frame, add homemade extensions, or place loose material beneath the feet.
Older adults who have fallen once face a higher risk of falling again, and many falls are never discussed with a clinician. Bathroom modifications such as grab bars and nonslip surfaces are repeatedly included in federal fall-prevention guidance. :contentReference[oaicite:0]{index=0}
BEFORE YOU ACT
Pause and ask for individualized help when the user has repeated falls, unpredictable weakness, fainting, new dizziness, severe pain, poor trunk control, difficulty following directions, or recent surgery with movement restrictions. An occupational therapist, physical therapist, qualified home-safety professional, or treating clinician can match the equipment and transfer method to the person rather than asking the person to adapt to unsuitable equipment.
Stop if the user cannot safely step over the tub wall
A standard shower chair sits entirely inside the bathtub. The user must still cross the tub wall to reach it. If lifting either leg over the wall requires pulling on a towel bar, leaning heavily on a caregiver, hopping, or rushing, changing the chair position will not solve the main problem.
That situation deserves a comparison with a transfer bench, which extends across the tub wall so a person can sit before bringing the legs into the bathing area. Even a bench needs adequate doorway clearance, correct assembly, stable footing, and enough bathroom space for the transfer.
Do not use the caregiver as a grab bar
A caregiver may provide supervision or trained assistance, but an improvised lift in a wet bathroom can injure both people. The helper needs a stable stance, an unobstructed exit route, and a transfer method appropriate to the user’s abilities.
When the transfer depends on the caregiver holding most of the person’s body weight, ask a rehabilitation professional to demonstrate a safer method. The right answer may involve different equipment, added grab support, or assisted bathing rather than a more heroic family member.
Start With the Transfer Side, Not the Showerhead
The first placement question is not, “Where will the water land?” It is, “How will the person reach the seat without taking extra steps on a wet surface?”
In many narrow tubs, the safest practical position is near the entry side while remaining fully on the flat tub base. This shortens the distance between crossing the tub wall and sitting. It also leaves less opportunity for a foot to slide while the user shuffles toward a chair parked at the far end.
Identify the stronger entry pattern
Observe which leg normally leads over the tub wall, which hand reaches for support, and which direction the person turns before sitting. Do not assume the dominant hand tells the whole story. Hip pain, knee stiffness, shoulder restrictions, or a recent operation may have changed the person’s usual pattern.
For a caregiver preparing the bathroom, a dry rehearsal can reveal more than several minutes of measuring. Watch for pauses, foot crossing, backward stepping, hurried reaches, and moments when the person loses sight of the seat.
Readers planning a broader recovery setup may also find the guides to observing a chair-rise test and making safer walker turns at home useful. A shower transfer often exposes the same sit-to-stand and turning difficulties seen elsewhere in the home.
Keep the sitting path short and predictable
The ideal sequence is simple: approach the tub, use approved support, cross the tub wall, make one controlled turn if needed, feel the chair behind the legs, and sit. Extra sideways steps are not a bonus feature.
Leave enough entry-side clearance for the leading foot to land flat. A chair can be too close to the entrance if it blocks the landing area or forces the user to squeeze between an armrest and the tub wall.
Likewise, a chair can be too far away if reaching it requires several wet-foot steps. The correct location balances a short transfer with full support beneath every chair foot.
Convenience is not the same as safety
Placing the chair directly beneath a fixed showerhead may improve water coverage but create a longer or more awkward transfer. A handheld showerhead can often solve the water-delivery problem without making the user travel deeper into the tub.
Think of the showerhead as adjustable service infrastructure. The transfer path is the load-bearing decision.
KEY TAKEAWAY
Place for the transfer first, then adapt the water. A handheld showerhead, hose holder, or reachable control can improve bathing comfort. None of those accessories can rescue an unstable chair footprint or a transfer that requires shuffling.
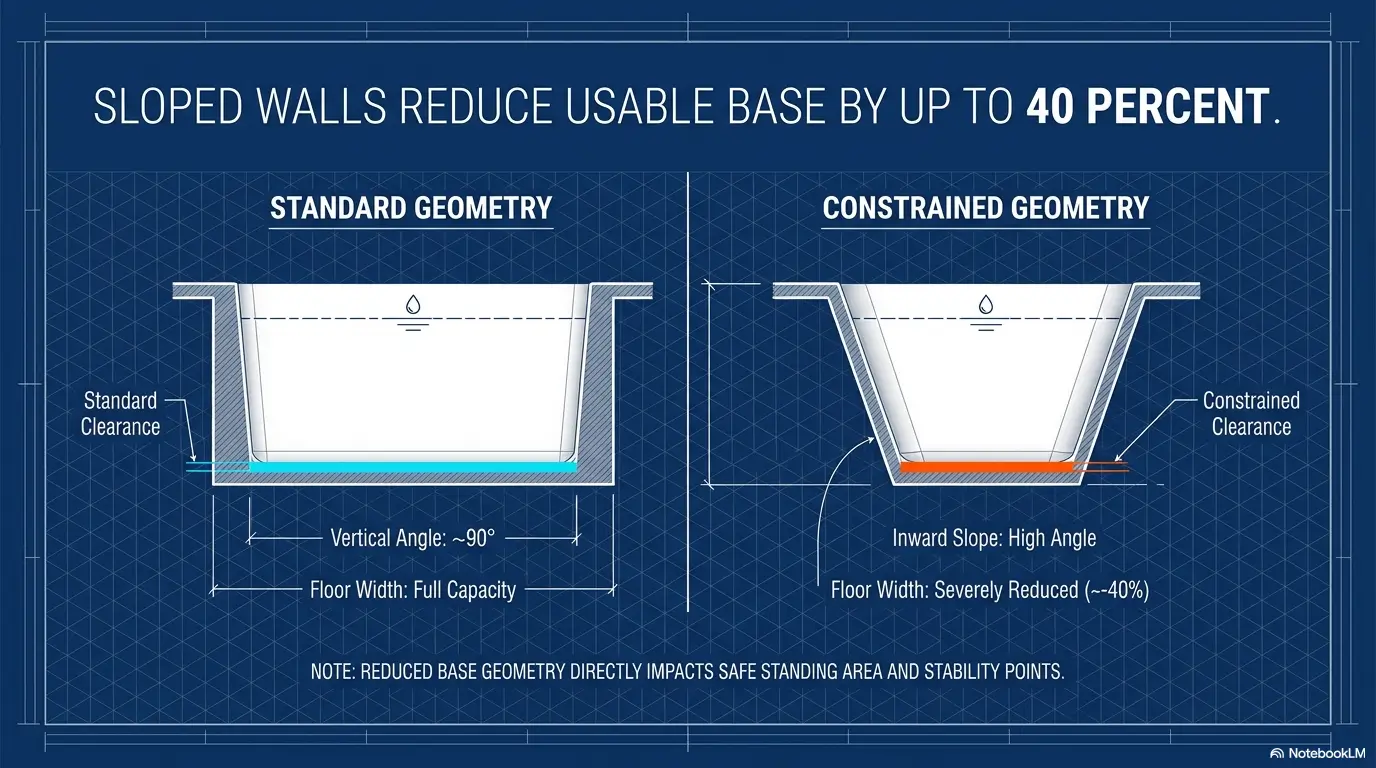
Find the Tub’s Flattest Four-Foot Zone
A narrow tub rarely has as much flat floor as it appears to have from above. The basin may begin curving upward several inches before the side wall, and molded contours can create small ridges around the drain or near the ends.
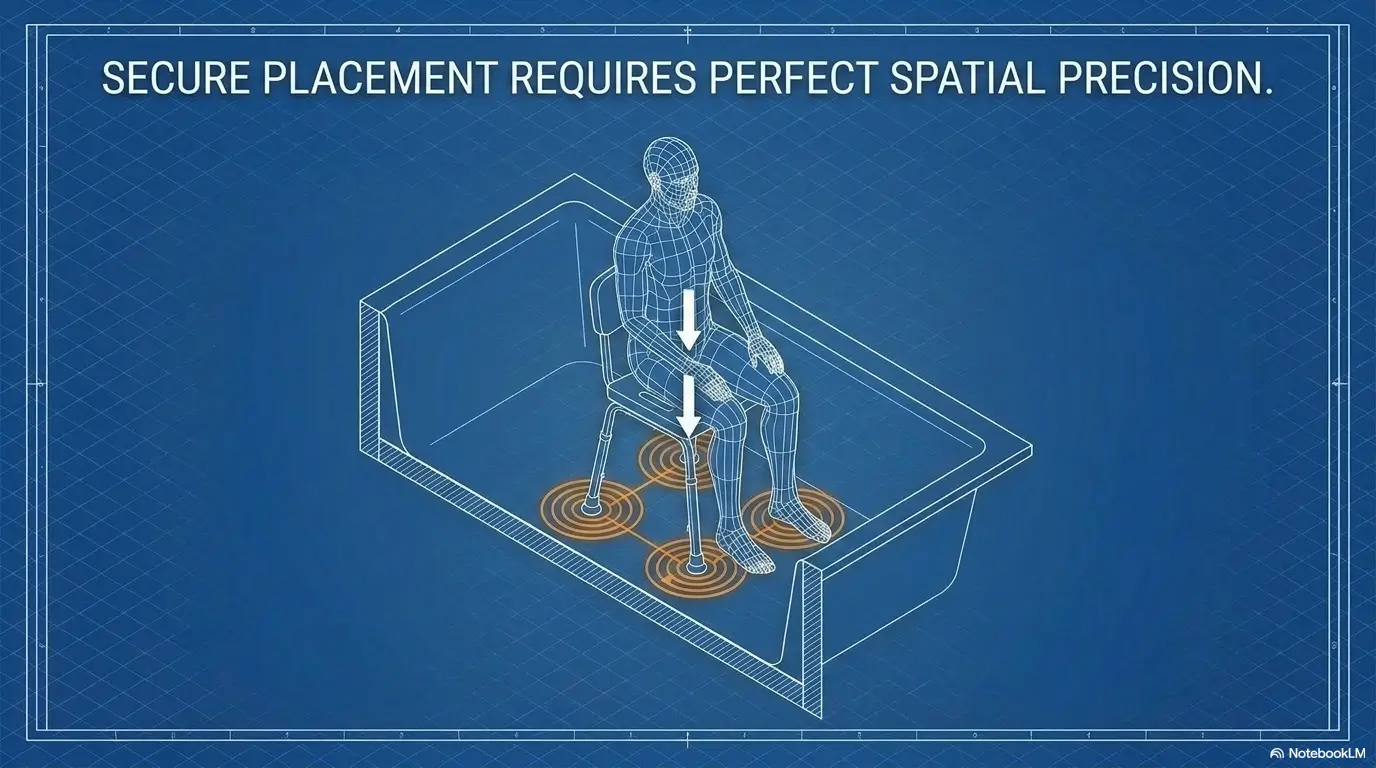
The chair needs four fully supported contact points. A rear foot resting partly on an upward curve can look acceptable while the chair is empty, then shift when the user leans back or pushes on an armrest.
Inspect each chair foot separately
Place the chair in the proposed location and crouch only if it is safe for you to do so. Use a flashlight or phone light to inspect the entire edge of each rubber tip or suction foot.
- The whole foot should rest on the tub floor.
- No foot should touch the curved side or sloped end.
- No foot should overlap the drain cover or a raised drain edge.
- No curtain material, hose, adhesive strip edge, or loose mat should sit beneath a foot.
- Adjustable legs should be locked at equal, manufacturer-approved settings unless the instructions specifically permit another configuration.
MedlinePlus advises using a bath or shower chair with nonskid rubber tips and keeping bathing supplies where the user does not need to stand, twist, or reach. :contentReference[oaicite:1]{index=1}
Perform the rocking test before anyone sits
With the empty chair correctly assembled, press downward on one front corner and the opposite rear corner. Then test the other diagonal. Apply controlled pressure rather than jerking the chair.
- Pass: The frame stays quiet and all four feet remain planted.
- Recheck: A slight sound appears, but no foot visibly lifts. Confirm assembly, leg locks, and surface contact.
- Fail: The chair rocks, skates, twists, tips, or lifts at one foot.
A failed test is not fixed by telling the user to “sit carefully.” Reposition the chair, inspect the feet for wear, confirm the frame is square, or choose different equipment.
Why a tiny slope becomes a large problem
Body weight does not remain centered during bathing. The load moves backward when the user sits, forward when standing, sideways when lifting a leg, and diagonally when reaching for soap or a grab bar.
A chair that feels stable under a straight downward push may move when force arrives from another direction. That is why placement must be evaluated as part of the full transfer, not as a furniture-arranging exercise.
Show me the nerdy details
A chair is most stable when its base of support remains level and the user’s center of mass stays within that base. Narrow tubs complicate both conditions. The floor curves upward, the user must cross a high tub wall, and the chair footprint may be only slightly smaller than the available flat area.
During standing, the user shifts body weight toward the feet and may push down or forward on armrests. If one rear chair foot sits on a slope, that change in force can unload another foot or make the frame rotate.
This is also why wedging an armrest against the tub wall is unreliable. The wall may temporarily limit movement, but it does not correct uneven support beneath the chair. It can also hide rocking until the chair is moved for cleaning.
Short Story: The Chair That Was “Almost Flat”
A daughter placed her father’s shower chair neatly in the center of a narrow tub. From the doorway, it looked symmetrical. It also lined up beautifully with the showerhead.
During a dry rehearsal, he sat without difficulty. When he leaned back to lift one foot, however, the chair made a small click. One rear rubber tip had been resting partly on the tub’s upward curve. The chair was not sliding, but it was changing position under load.
They moved it a few inches toward the entry side, turned it slightly, and checked every foot with a flashlight. The revised position looked less tidy. It gave him a shorter approach, better foot room, and no rocking.
The lesson was quiet but useful: bathroom safety rarely rewards visual symmetry. It rewards full contact, simple movements, and tests that resemble real use.
Choose the Safest Chair Direction
Once you locate a flat footprint, decide which direction the chair should face. Forward, slightly angled, and sideways placements can each work in the right tub. None is automatically safe.
Use forward-facing placement when standing space is clear
A forward-facing chair often feels familiar and gives the user a direct sit-to-stand pattern. It works best when there is enough space for both feet to rest flat in front of the chair and the faucet does not crowd the knees.
Check that the user can reach water controls without leaning beyond the chair base. Hot-water controls should not be activated accidentally by a knee, elbow, shoulder, or chair arm.
Use a slight angle only when all four feet remain supported
In an exceptionally narrow tub, a small angle may create more knee room or improve alignment with the entry. The angle must not place one chair foot on the curved side of the tub.
Do not keep rotating the chair until it “sort of fits.” If the stable four-foot footprint disappears at the useful angle, the chair and tub may simply be incompatible.
Use sideways placement only with a clear transfer plan
A side-facing chair can help some users align with the tub entrance, particularly when they can sit and then reposition the legs with controlled movement. However, a standard chair still sits inside the tub, so the user usually must cross the tub wall before sitting.
Do not confuse a sideways chair with a transfer bench. A bench is designed to bridge the tub wall. Rotating on a small shower chair can introduce twisting, friction, and tipping forces the chair was not intended to handle.
The Narrow-Tub Placement Sequence
1. TRANSFER
Start from the user’s actual entry side and turning pattern.
2. FOOTPRINT
Find four full contact points on the flat tub floor.
3. DIRECTION
Choose the orientation that leaves room for knees and feet.
4. CLEARANCE
Check the faucet, drain, curtain, track, hose, and helper’s stance.
Watch the Door, Curtain, Hose, and Drain
A chair can pass the stability test and still create a hazardous bathing setup. Narrow tubs are crowded systems. The chair shares space with the user’s feet, water controls, a drain, a curtain or door, and often a flexible shower hose.
Treat a sliding-door track as part of the transfer
A raised metal track increases the height and precision required to enter the tub. It can also reduce the effective opening width, leaving too little space for a walker, caregiver, transfer bench, or safe hand position.
Do not encourage the user to step onto the track. If the doors make the transfer unworkable, ask a qualified professional whether removal or a different bathing arrangement is appropriate. Glass-door work should be handled carefully because tempered panels are heavy and require correct storage or disposal.
The separate guide to bathroom doorway fall risks can help identify hazards before the user even reaches the tub.
Keep the curtain outside the chair footprint
A shower curtain can fold beneath a rubber chair tip and reduce traction. It can also wrap around the user’s lower legs during standing, creating the bathroom equivalent of an ankle-level ambush.
Arrange the curtain so it contains water without entering the chair footprint. Check the setup with the chair occupied during a dry rehearsal, because the curtain may move differently once the user’s legs are in place.
Keep the drain and hose functional
No chair foot should rest on the drain cover. Leave enough space for water to escape so the user’s feet are not sitting in a growing pool.
Route a handheld shower hose away from chair legs and the standing area. The hose should reach the user without wrapping around the frame, dragging across the feet, or requiring a long forward lean.
Shower Chair or Transfer Bench?
Buying a wider, heavier, or more expensive chair does not automatically create a safer bathroom. The best option is the one that matches the transfer, fits the tub, supports the user, and can be assembled exactly as intended.
Bathroom aids commonly include shower chairs, transfer benches, handheld showerheads, and grab bars. Occupational therapy is particularly useful when equipment must be matched to real movement inside a specific home. :contentReference[oaicite:2]{index=2}
| Option | May suit | Main limitation | What to verify before paying |
|---|---|---|---|
| Compact shower stool | Independent users with good trunk control and a very small flat tub base | Usually lacks back and arm support | Seat size, leg spread, weight limit, foot compatibility, turning space |
| Standard shower chair | Users who can cross the tub wall and need seated bathing | Does not remove the step-over transfer | Full four-foot contact, knee room, backrest clearance, armrest suitability |
| Tub transfer bench | Users who benefit from sitting before moving the legs over the tub wall | Requires more bathroom width and correct placement across the tub | Door clearance, leg adjustment, curtain management, bathroom floor stability |
| Professional home-safety assessment | Users with falls, uncertain transfers, multiple conditions, or caregiver lifting concerns | May involve scheduling and out-of-pocket cost | Provider credentials, home-visit scope, equipment recommendations, written plan |
Good, better, and best depend on the user
| Setup level | What it may include | Best for | Do not use it when |
|---|---|---|---|
| Good | Correctly sized chair, full foot contact, dry floor, reachable supplies | A stable independent sitter with a straightforward tub entry | The user must pull, hop, twist sharply, or rely on furniture |
| Better | Chair plus properly placed grab support and handheld showerhead | A user who needs more predictable hand placement and seated water control | Grab bars are improvised, suction devices are used outside their instructions, or the tub floor is incompatible |
| Best matched | Individual assessment, transfer rehearsal, suitable chair or bench, caregiver plan | A person with recent falls, surgery, neurological changes, or uncertain balance | The assessment does not include the actual bathroom or the equipment cannot be tested in context |
What to ask before buying another chair
- What is the chair’s outside leg-to-leg footprint at the needed seat height?
- Does that footprint fit entirely on the tub’s flat base?
- Are the feet approved for a textured, smooth, or refinished tub surface?
- Can the chair be returned after a careful dry fit?
- Does the seat width fit the user without crowding the tub wall?
- Will armrests assist standing, or block entry in the narrow space?
- Can a caregiver stand safely without lifting from an awkward angle?
- Are replacement rubber tips or suction feet available from an approved source?
Budget-conscious buyers should measure before shopping. The cheapest unsuitable chair is not economical, and a premium chair cannot manufacture flat floor space inside a curved tub.
KEY TAKEAWAY
Measure the tub base, not the tub opening. Product width can look acceptable while the chair’s feet land beyond the narrow flat section. Compare the real leg footprint at the intended seat height.
Common Placement Mistakes That Make the Tub Riskier
Most shower-chair errors are not dramatic. They are ordinary shortcuts that remain invisible until the user leans, turns, or stands.
| Common mistake | Why it fails | Safer alternative |
|---|---|---|
| Automatically centering the chair | The geometric center may not be the flattest or easiest transfer location | Prioritize full foot contact and entry-side clearance |
| Placing rear feet on the tub curve | The chair may shift when weight moves backward | Move forward until every foot rests on the flat base |
| Wedging the chair against a wall | Wall contact can hide an uneven base without correcting it | Leave inspection clearance and rely on proper footing |
| Using a towel as a shim | Fabric compresses, moves, holds water, and changes traction | Use only manufacturer-approved parts and surfaces |
| Leaving no standing room | The user must twist or rise with the feet tucked underneath | Provide space for both feet to rest flat before standing |
| Testing only the empty chair | Real transfers add forward, backward, and sideways forces | Rehearse the movement dry with appropriate supervision |
| Ignoring worn rubber feet | Cracks, hardening, or contamination can reduce grip | Inspect and replace parts according to the manufacturer |
Never level the chair with loose material
Do not put towels, washcloths, folded bath mats, foam pads, wood, bottle caps, or homemade shims beneath the chair legs. These materials can compress or move, and they may interfere with drainage or traction.
If the chair cannot stand level using its approved adjustments, it does not fit that location.
Do not test safety by taking an avoidable risk
A dry rehearsal should happen fully clothed, without running water, with the bathroom floor clear and appropriate help nearby. The user should not rush, step onto a slippery surface intentionally, or attempt an unfamiliar transfer alone.
After the dry rehearsal, inspect how the chair behaves when the tub and rubber tips become damp, following the manufacturer’s instructions. Start with the empty chair and controlled hand pressure. Stop immediately if the chair moves or if checking it would expose anyone to a fall.
A safe position can become unsafe later
Chair legs may be changed during cleaning. Rubber tips wear. Soap film accumulates. A new bath mat appears. The user’s mobility changes after illness, medication adjustments, pain flares, or surgery.
Recheck the setup whenever the chair is removed, adjusted, replaced, or used by another person. A visual marker can help restore the approximate location, but it does not replace the rocking test.
RED-FLAG MOMENT
Stop using the chair if the frame bends, fasteners loosen, legs no longer lock, rubber tips split, suction feet fail to engage as instructed, or the chair rocks after repositioning. Do not compensate with extra caution, towels, or a stronger grip.
Build a Safer Zone Around the Chair
Chair placement is only one layer of bathroom safety. The surrounding zone should support the same movement sequence, from approaching the tub to drying off afterward.
The National Institute on Aging recommends grab bars inside and outside the tub or shower, nonskid treatment on wet surfaces, and adequate bathroom lighting. :contentReference[oaicite:3]{index=3}
Put support where the transfer happens
A grab bar is useful when it matches the user’s hand position and direction of force. A beautifully installed bar on the wrong wall may invite twisting or remain out of reach at the critical moment.
Towel racks, soap dishes, curtain rods, and faucet handles are not substitutes for structural grab support. Professionally installed bars should be matched to the wall construction and the user’s transfer pattern.
Caregivers who need to begin the conversation without making a parent feel managed may find this guide to a respectful shower-safety conversation helpful.
Remove reach-and-twist hazards
Place soap, shampoo, washcloths, and the handheld showerhead within comfortable seated reach. Storage should not project so far into the tub that it crowds the user’s shoulders or catches an arm during standing.
- Keep frequently used items between roughly waist and shoulder height while seated.
- Avoid bottles on the tub floor.
- Do not require the user to reach behind the body.
- Secure the shower hose so it cannot loop around a chair leg.
- Place towels outside the tub within easy reach after the transfer is complete.
Prepare the exit before turning on the water
The floor outside the tub should be dry, uncluttered, and large enough for a stable landing. Choose a nonskid bathroom mat intended for the floor rather than a loose towel that can slide or bunch.
Park mobility equipment where it can be reached after exiting without blocking the tub opening. The guide to choosing a safe walker parking spot explains why the closest location is not always the most usable one.
Lighting matters too. The user should be able to distinguish the tub wall, chair seat, floor edge, and grab support without relying on reflections from a glossy surface.
Check the caregiver’s clearance, not just the user’s
A helper needs somewhere to place both feet without straddling a toilet, stepping onto a wet mat, or leaning across the faucet. The bathroom door should not trap the caregiver behind it or block an emergency exit.
If hands-on help is expected, rehearse where the caregiver stands and what assistance will be provided. Avoid vague plans such as “I’ll catch you.” A specific transfer plan is kinder to everyone’s spine.
KEY TAKEAWAY
A safe shower-chair zone includes the approach and exit. The chair can be perfectly stable while a raised door track, wet floor, badly parked walker, or unreachable towel makes the overall routine unsafe.
FAQ: Narrow-Tub Shower Chair Placement
How close should a shower chair be to the tub entrance?
There is no universal inch measurement. Place it close enough to avoid unnecessary wet-floor steps, but far enough inside the tub to give the leading foot a flat landing area. All chair feet must remain on the tub’s level base.
Should the chair sit directly beneath the showerhead?
Only when that location also provides a stable footprint and a simple transfer. A handheld showerhead often lets the chair remain near the safer entry-side location while still giving comfortable water coverage.
Can a shower chair face sideways in a small bathtub?
It may, provided every foot remains fully supported and the orientation does not require unsafe rotation. A side-facing shower chair is not the same as a transfer bench and should not be used to imitate one.
What if the tub floor is curved everywhere?
If the tub does not offer a flat footprint large enough for the chair, do not force the fit. Compare a different approved chair footprint, a properly fitted transfer bench, another bathing location, or a professional home-safety assessment.
Can a shower chair be used with glass tub doors?
Possibly, but the door opening and raised track must leave enough room for the user, chair, hands, and any helper. Never use the glass door or frame as a grab bar. A transfer bench may be difficult or impossible to position without altering the enclosure.
Is it safe to place the chair near the faucet?
Only if the faucet and controls do not crowd the knees, create a burn hazard, or require leaning. The user should be able to adjust or shut off the water without reaching far beyond the seat.
Do suction-cup feet work on a textured tub?
Compatibility varies. Texture, grout lines, refinishing coatings, dirt, and surface damage may affect suction. Follow the chair manufacturer’s instructions for approved surfaces rather than assuming visible suction means reliable support.
How much space does a caregiver need?
Enough room to stand with both feet supported, avoid twisting, and leave an unobstructed exit. When the caregiver must lift, reach across fixtures, or stand on a wet surface, the setup needs reassessment.
Should chair placement change after surgery?
It may. Weight-bearing limits, joint precautions, sling use, pain, swelling, and reduced endurance can alter the transfer. Confirm post-operative instructions and ask the rehabilitation team to review the bathroom setup when restrictions are unclear.
When is a professional home assessment worth considering?
Consider one after a fall, when the transfer changes from day to day, when a caregiver provides substantial physical help, or when no chair position offers both stable footing and adequate movement space. A home-based occupational therapy assessment can connect the equipment recommendation to the actual tub, doorway, flooring, and user.
Mark the Safest Footprint in the Next 15 Minutes
The final position should be easy to reproduce after cleaning, but it should never become unquestioned. Use the following short process while the tub is dry and the user is fully clothed.
The 15-minute placement plan
- Minutes 0–3: Clear the doorway, tub edge, floor, curtain, and shower hose. Inspect the chair frame, fasteners, leg locks, and rubber feet.
- Minutes 3–6: Place the chair near the likely transfer side. Confirm that each foot rests completely on the flat tub base.
- Minutes 6–8: Press opposite chair corners and check for rocking, twisting, squeaking, skating, or lifting.
- Minutes 8–12: Rehearse approaching, crossing the tub wall, turning, sitting, placing both feet, standing, and exiting with appropriate supervision.
- Minutes 12–14: Check knee room, faucet clearance, grab-support reach, shower-hose routing, curtain position, drainage, and caregiver stance.
- Minute 15: Mark reference points outside the chair-foot contact areas with removable, water-resistant markers that will not create a raised edge.
Pass or pause?
| Pass when | Pause when |
|---|---|
| All four feet are fully supported | Any foot touches a slope, drain edge, curtain, hose, or loose material |
| The user reaches the seat with a short controlled path | The user shuffles, crosses the feet, hops, or loses sight of the chair |
| Both feet rest flat before standing | Knees strike the faucet or feet must tuck awkwardly beneath the seat |
| Approved support is reachable without leaning | The user pulls on a towel rack, door, faucet, or caregiver |
| The caregiver has a stable stance and clear exit | The helper must twist, lift heavily, or stand on a wet obstruction |
Take a photo of the final setup for reference, including the chair orientation and clearance around each foot. Recheck the chair whenever it is moved, cleaned, adjusted, or used by someone with different mobility needs.
For a wider household review, use the pre-surgery fall-risk checklist or the guide to recognizing fall risk in older adults. The safest shower-chair placement works best as part of a clear route through the entire home.
THE FINAL CHECK
Stand in the doorway and mentally replay the entire shower. Where does each foot land? What does each hand hold? Where does the water go? How does the person stand and leave? When every answer is simple, visible, and repeatable, the chair is no longer merely inside the tub. It is part of a safer transfer.
Last reviewed: 2026-09