
This site is written from a family-caregiver perspective. The operator is not a medical professional. This article provides general education and preparation prompts rather than an individual assessment.
Separate permission to work from desk comfort
Use these prompts to prepare questions and arrangements. They do not diagnose a condition, determine coverage or clear an activity.
- What to record
- Actual procedure, restrictions, work tasks, chair and route access, medicine effects and help available.
- What to ask
- What work is appropriate now, and can therapy or occupational health review the proposed arrangement?
- Next action and owner
- Clarify return-to-work instructions and agree duties; a comfortable chair is not permission for a full workday. Write down who will act and when to follow up.
Keep personal records private. You can use the visit preparation organizer to arrange questions; do not post identifying health information in comments.
A practical recovery workspace guide
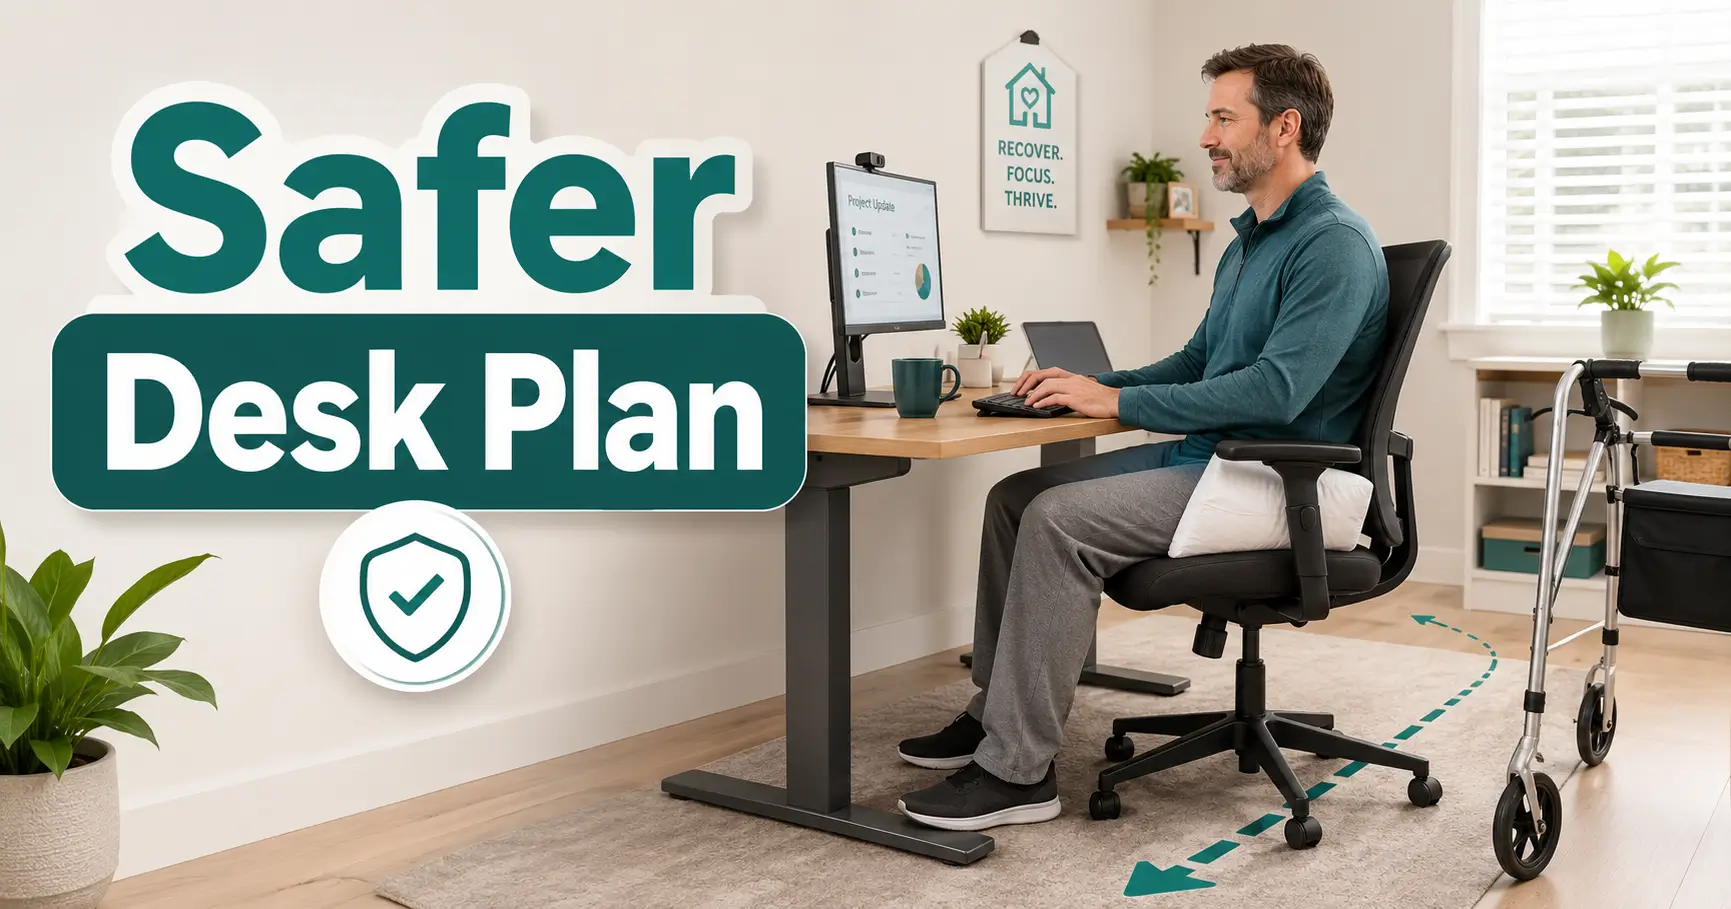
Work-From-Home Setup After Hip Surgery: A Safer Desk Plan
The ordinary home office asks one question: “Can you get your work done?” A post-surgery workstation must ask several more. Can you approach the chair safely? Can you sit without breaking a movement restriction? Can you reach the keyboard without folding forward, and can you stand again when your hip is tired?
After hip replacement, fracture repair, arthroscopy, tendon repair, or another hip procedure, familiar furniture can become surprisingly complicated. A soft couch may feel inviting but make the exit difficult. A rolling office chair may glide beautifully until it moves during a transfer. Even a well-designed standing desk can be the wrong answer when balance, weight-bearing, or medication effects are still changing.
This guide helps employees, freelancers, patients, and caregivers build a temporary workstation around the actual recovery plan. The goal is not to create a showroom office. It is to create a small, calm operating zone where the computer comes to the patient, the walking route stays clear, and work never quietly outranks healing.
The safest workstation is not the most ergonomic one on paper. It is the one you can enter, use, and leave without improvising. 🪑
Snapshot
This guide is for desk-based workers and caregivers preparing a temporary home workstation after hip surgery. It shows how to translate medical restrictions into chair, desk, equipment, schedule, and fall-prevention decisions, then test the entire setup before the first work session.
Table of Contents
Start With Your Restrictions, Not the Furniture Catalog
A work-from-home setup after hip surgery begins with four pieces of information: how much weight you may place through the operated side, which hip movements are restricted, how often you have been told to walk or exercise, and when your care team considers work appropriate.
Without those instructions, chair height and desk accessories are educated guesses. The setup that suits a person after an uncomplicated total hip replacement may be inappropriate after fracture fixation, hip arthroscopy, tendon repair, revision surgery, or a procedure followed by strict weight-bearing limits.
Before You Act
This article offers general educational guidance, not a personalized rehabilitation plan. Follow your discharge paperwork and confirm uncertain movements, sitting positions, equipment, work timing, and symptom changes with your surgeon, physical therapist, occupational therapist, or other qualified clinician.
Find These Four Instructions First
- Weight-bearing status: Determine whether you are non-weight-bearing, toe-touch, partial, weight-bearing as tolerated, or following another instruction.
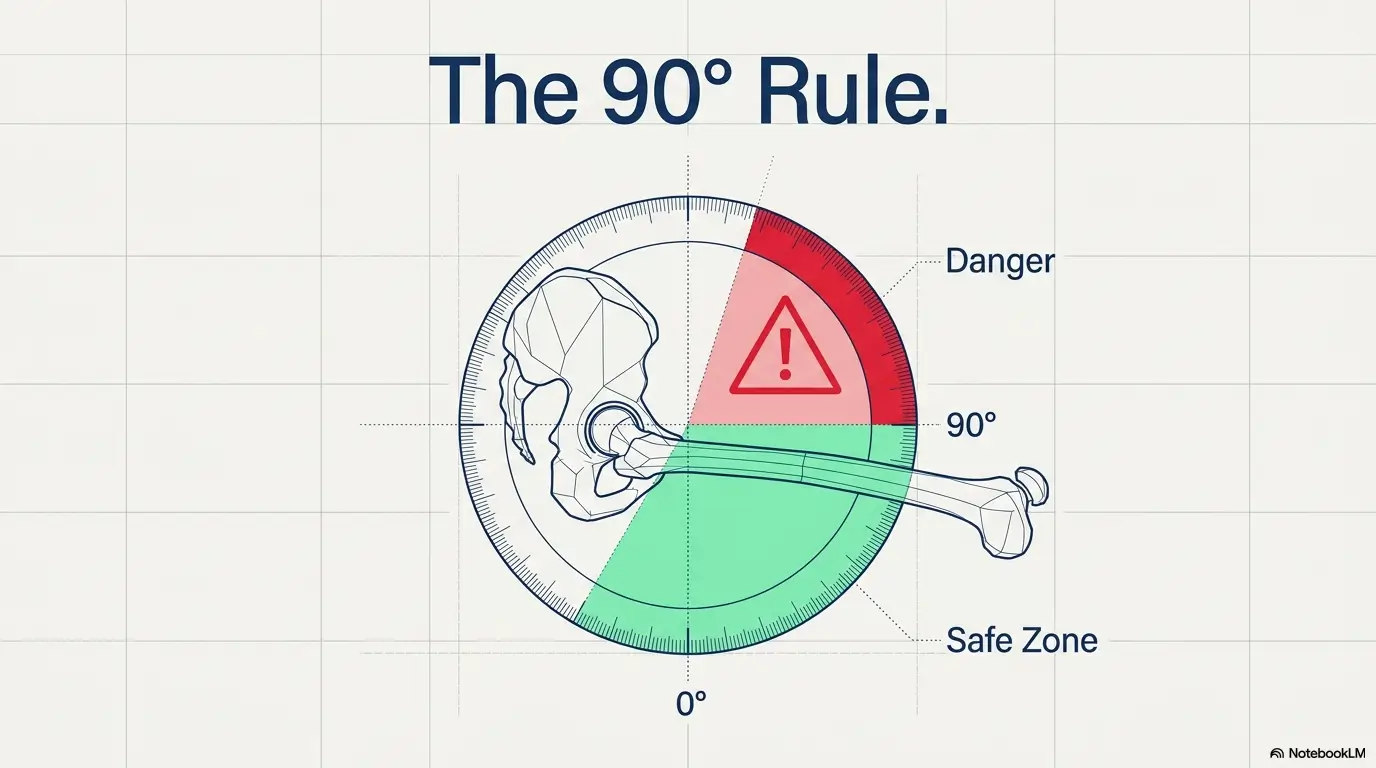
- Movement precautions: Confirm any limits involving bending, crossing the legs, rotating the hip, extending the leg behind you, or pivoting.
- Movement schedule: Review prescribed walking, exercises, position changes, elevation, icing, or rest periods.
- Work clearance: Ask whether clearance covers a few computer tasks, a reduced schedule, or a full workday.
Write these instructions on one page and keep it beside the workstation. A caregiver can also add them to a shared recovery chat using a simple structure such as the one in this caregiver group chat guide.
Why the Procedure Changes the Rules
Hip surgery is an umbrella term, not a single recovery script. Total hip replacement guidance often discusses dislocation precautions and stable, higher seating. Arthroscopy instructions may focus on protecting repaired tissue, limiting weight-bearing, or controlling repetitive hip flexion. Fracture repair may involve restrictions determined by bone healing and fixation stability.
This is why universal statements such as “never bend past this angle” or “always keep the operated leg straight” can be misleading. Use general workstation principles only after filtering them through the procedure-specific plan.
Comfort Is Feedback, Not Clearance
A restricted movement may not hurt immediately. Pain medication can also soften the warning signal without changing the medical restriction. The absence of pain therefore does not prove that a chair, footrest, transfer, or sitting posture is suitable.
Key takeaway
Let medical instructions define the safe movement envelope. Then fit the workstation inside it, rather than asking your body to fit an ordinary office.
The Chair Test That Decides Whether the Desk Works
The chair is not simply where you sit. It is a transfer device that must remain stable while you approach it, turn, lower yourself, work, and stand again.
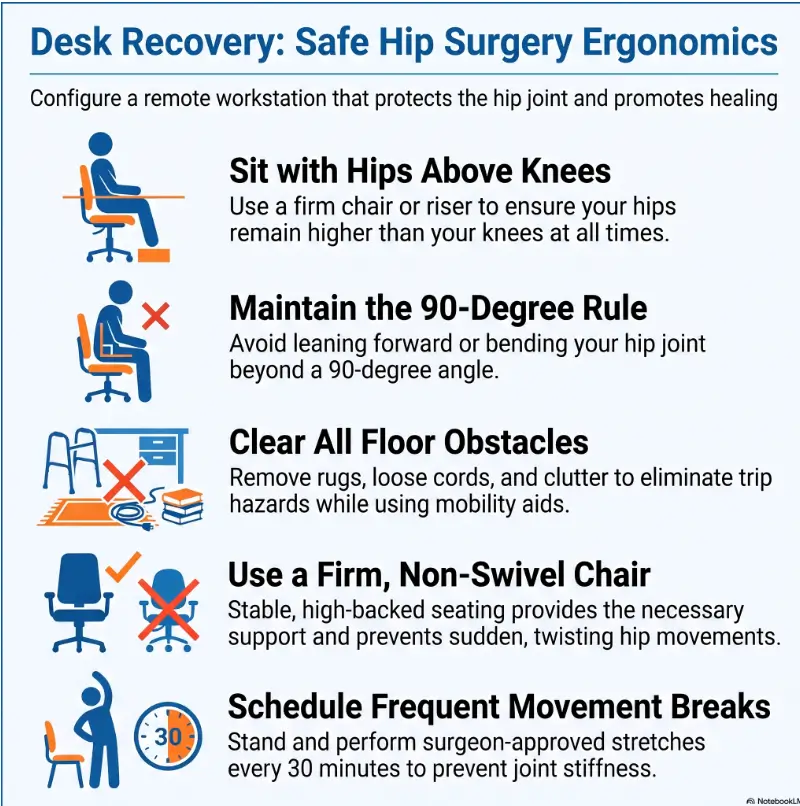
For early recovery after total hip replacement, the American Academy of Orthopaedic Surgeons describes a stable chair with a firm seat, firm back, and two arms. It also notes that seat height may need to keep the knees lower than the hips for patients following that precaution. Those details should not be copied automatically to every procedure. AAOS hip-replacement planning
Firm, Stable, and Predictable Beats Luxurious
A suitable temporary chair usually has a firm seat that does not collapse deeply, a back that supports an upright or slightly reclined position, and armrests that can be used according to your transfer instructions. Its feet or base should remain planted when you sit or stand.
Be cautious with office chairs that swivel freely, roll easily, rock backward, or have armrests that move under pressure. A premium ergonomic chair may be excellent six months later and awkward during week one.
For a closer look at measuring and testing the seat itself, use this guide to office chair height after hip surgery.
Run the Five-Movement Chair Trial
- Approach the chair using the prescribed walker, crutches, or cane.
- Turn using the technique taught by the rehabilitation team, without a sudden pivot.
- Lower into the seat with control and without dropping the last few inches.
- Reach the keyboard and mouse while keeping the trunk supported and avoiding restricted bending or twisting.
- Stand using the approved hand placement and leave with the mobility aid already available.
Failing any one step means the workstation is not ready. Do not grade the chair only on how it feels after you are already seated. The difficult moment is often the exit, especially after fatigue has accumulated.
Be Careful With Cushions and Seat Risers
A secure, purpose-appropriate seat modification may help achieve the height recommended by the care team. A stack of loose pillows is different. It can compress unevenly, slide toward the edge, narrow the usable seat, or change the height every time you sit.
Before buying a cushion or riser, compare its firmness, non-slip base, dimensions, weight limit, and effect on armrest access. Check whether the new height still allows your feet to be positioned according to your rehabilitation instructions.
Show me the nerdy details
Chair height affects more than the angle at the hip. It changes how far the center of mass must travel during standing, how much force is needed from the legs and arms, and whether the user must lean forward to generate momentum.
A higher chair can make standing easier, but excessive height may reduce stable foot contact or create a sliding sensation. The useful height is therefore the one that satisfies the patient’s precautions and allows a controlled transfer, not simply the tallest seat available.
Build a Recovery Cockpit Without Trapping Yourself
The best temporary setup behaves like a small cockpit. Everything essential is close enough to reach without folding, twisting, or hunting on the floor. Unlike a real cockpit, however, one side must remain open enough for a walker, crutches, or a caregiver.
Create an Easy-Reach Zone
- Phone and charger
- Water in a stable, easy-open container
- Medication schedule, without changing the prescribed storage method
- Tissues and waste container
- Notebook, pen, and work login information
- Remote controls and lighting controls
- Headset for calls
- A small snack, when allowed and appropriate
Place frequently used items between roughly waist and shoulder height while seated, then confirm the arrangement against your specific restrictions. Avoid storing chargers, papers, or supplies under the desk if retrieving them requires bending toward the floor.
Leave One Side Open
A small side table can help, but two side tables may create a pen. Leave a predictable entry and exit side, and keep the mobility aid in a consistent location where it can be reached before standing.
Do not use the walker as a laptop stand, storage rack, or moving side table. A dedicated walker parking spot beside the workstation can prevent it from drifting behind a chair or becoming buried under bags.
Clear the Full Route, Not Just the Desk
The workstation route includes every place you may need to reach during work: bathroom, kitchen, medication area, bedroom, front door, and charging outlet. Loose rugs, clutter, poor lighting, cords, and uneven surfaces can add to fall risk, particularly when walking ability, balance, or medication effects have changed. CDC fall prevention
- Route power cords along a wall or behind furniture.
- Remove throw rugs unless the care team has approved a secure arrangement.
- Move pet beds, baskets, and decorative stools out of the route.
- Check that doors open fully without striking the walker.
- Add lighting for early-morning and evening bathroom trips.
- Keep frequently used doors from closing unexpectedly.
A broader home fall-risk checklist can help a caregiver inspect the route before discharge or before the first remote shift.
The Safer Workstation Sequence
Place the Screen and Keyboard Without the Forward-Reach Trap
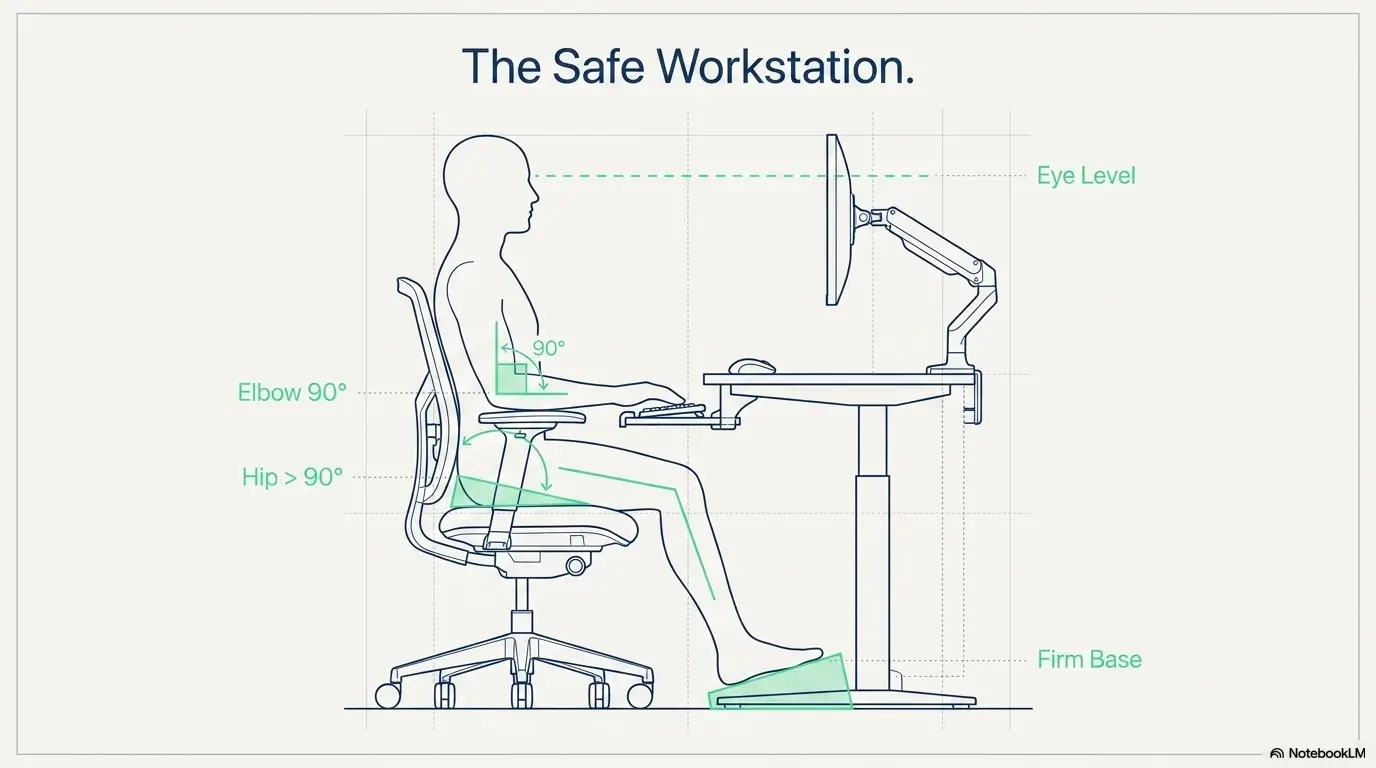
Once the chair and transfer are safe, bring the work toward the body. A monitor placed attractively at the back of a deep desk may cause repeated forward leaning. A mouse placed far to the side may encourage twisting that becomes more pronounced as fatigue grows.
Keep the Keyboard and Mouse Close Together
OSHA workstation guidance recommends relaxed shoulders, elbows close to the body, and wrists aligned with the forearms. It also advises keeping the mouse near the keyboard. These are ordinary ergonomic principles, but they become especially useful when the goal is to prevent repeated reaching from the hip. OSHA workstation guidance
- Center the keyboard in front of the torso.
- Place the mouse immediately beside it.
- Move paperwork onto a raised document holder rather than the lap or floor.
- Use keyboard shortcuts to reduce repeated mouse travel.
- Keep the desk edge from pressing sharply into the forearms.
Raise the Laptop, Then Separate the Controls
A laptop creates a small mechanical argument. If the screen is high enough, the keyboard may be too high or far away. If the keyboard is comfortable, the screen may pull the head and torso downward.
A stable laptop platform paired with an external keyboard and mouse often resolves that conflict. Make sure the platform cannot slide and does not require you to reach upward to use the built-in keyboard.
Increase Text Size Before Pulling the Monitor Closer
Increase display scaling, browser zoom, and application font size before crowding the screen against your face. OSHA advises selecting a viewing distance that permits comfortable reading while the head and torso remain upright and the back stays supported. OSHA monitor guidance
Keep the primary monitor centered. A second screen may be useful later, but it is not helpful if it creates dozens of small twists during every meeting.
Key takeaway
Do not lean toward the work. Raise, enlarge, and reposition the work until it can be used from the posture permitted by your care plan.
Use Work Blocks That Respect Recovery
Remote work removes the commute, but it does not remove the physical cost of concentration. Email can keep a person seated far longer than intended, especially when pain is temporarily controlled and the next meeting begins with one click.
Treat Clearance as the Starting Line
A return-to-work date does not automatically mean full productivity, full hours, or unrestricted sitting. Ask whether your clinician is clearing you for brief computer tasks, a reduced schedule, or normal duties.
Published recovery estimates for sedentary work after total hip replacement are broad and procedure-specific. Your operation, complications, medication use, transportation needs, job demands, and functional progress matter more than another patient’s calendar.
Build From Capacity, Not an Eight-Hour Target
Begin with the shortest useful work block your clearance allows. That may be one essential call, a small group of emails, or a single focused task followed by the prescribed movement or rest routine.
| Recovery phase | Work emphasis | Schedule approach | Stop signal |
|---|---|---|---|
| Very early return | Essential communication only | One short block at a time | Transfer difficulty, fogginess, or rising symptoms |
| Gradual return | Focused tasks with fewer meetings | Planned breaks between blocks | Reduced walking quality or accumulating fatigue |
| Expanded schedule | Broader duties with modifications | Longer blocks only when tolerated and approved | Symptoms affecting the next work block or rehabilitation |
| Normal schedule | Usual desk duties | Regular ergonomic and movement routine | New or worsening postoperative concerns |
This table is a planning framework, not a medical progression schedule. Recovery is not a staircase with identical steps. It is closer to a dimmer switch, adjusted with clinical guidance and honest observation.
Protect Rehabilitation Time From the Calendar
- Block therapy appointments before accepting meetings.
- Add buffer time after bathing, dressing, and transfers.
- Schedule demanding tasks for the clearest part of the day.
- Avoid back-to-back video calls when movement breaks are prescribed.
- Use calendar reminders for approved walking, medication, hydration, or exercises.
- Keep work from replacing medically recommended rest, elevation, or icing.
Real-World Example: The Meeting Schedule Was the Real Problem
A remote project manager prepared carefully after hip surgery. The chair was firm, the laptop was raised, and every cord was secured. Yet by midafternoon, standing felt more difficult than it had in the morning.
The problem was not the furniture. Six video calls had been scheduled with only five-minute gaps. Those gaps disappeared into notes and follow-up messages, so the manager remained seated through the movement periods included in the recovery plan.
The safer revision cost nothing. Meetings were shortened, two updates became written messages, and a protected buffer was added after each call. The workstation stayed the same, but the workday stopped behaving like a restraint.
The lesson is simple: ergonomic equipment cannot rescue a calendar that repeatedly overrides the body.
Bed, Couch, Recliner, or Standing Desk: Which Options Actually Fit?
Convenient furniture can become inconvenient the moment you need to stand. Judge every alternative by transfer safety, posture, equipment reach, mobility-aid placement, and the instructions for your specific procedure.
Working From Bed
Bed work often encourages slumping, rotation, reaching across blankets, and balancing a laptop on the thighs. It can also tangle chargers around the area used for getting in and out of bed.
Short, approved phone tasks may be possible for some people, but the bed should not quietly become an all-day workstation. Preserve it as a rest and sleep space unless your care team has recommended another arrangement.
Using a Low or Soft Couch
Low couches often create a deep hip position and a difficult exit. Soft cushions can also allow one side of the pelvis to sink more than the other. Hip replacement instructions from MedlinePlus advise firm seating with a straight back and armrests and caution against low, soft chairs and sofas. Those recommendations apply to hip replacement care and should not be generalized without checking your own instructions. MedlinePlus hip-replacement discharge
Using a Recliner
A recliner may work when its seat is firm enough, its height is appropriate, and the controls can be reached without twisting. Test whether the foot section blocks the walker or requires a forceful leg movement to close.
Powered controls can reduce effort, but a powered chair is not automatically safe. Check what happens during a power outage, whether the chair shifts during entry, and whether the raised foot section changes the prescribed hip position.
Using a Standing Desk
Standing is not automatically safer than sitting. It requires suitable weight-bearing status, balance, endurance, footwear, and a safe location for the walker or crutches. A standing desk can also encourage quiet weight shifting onto one side.
Ask the rehabilitation team whether supported standing is appropriate and how long it should last. The right question is not “Can the desk rise?” It is “Can I use the raised position without compromising the recovery plan?”
Key takeaway
Furniture should earn its place by passing the entry, posture, reach, and exit tests. Familiarity is not evidence of safety.
What to Buy, Borrow, or Skip
A safer post-surgery workstation does not need to become an expensive renovation. Many useful changes involve removing hazards, relocating equipment, and borrowing temporary items rather than buying permanent furniture during a short recovery phase.
Good, Better, and Best Setup Options
| Setup tier | What it may include | Best for | What to verify |
|---|---|---|---|
| Good | Existing firm chair, cleared route, relocated monitor, nearby essentials | Short recovery period and limited budget | Chair stability, seat height, transfer technique, cord placement |
| Better | External keyboard and mouse, stable laptop stand, headset, secure side table | Regular computer work or video meetings | Reach distance, screen height, table stability, open exit route |
| Best fit for complex needs | Clinician-reviewed chair height, adaptive equipment, employer-supplied peripherals, home assessment | Strict precautions, limited mobility, repeated transfer difficulty, or complex home layout | Professional credentials, equipment return policy, measurements, insurance or benefit rules |
The “best” tier is not the most expensive. It is the level of support that matches the actual difficulty. A borrowed stable chair may outperform a costly office chair that rolls during transfers.
Useful Low-Cost Changes
- Increase display scaling and text size.
- Move the monitor and keyboard closer.
- Relocate the workstation to the same floor as the bathroom.
- Use a headset to reduce reaching for the phone.
- Move chargers to an outlet that does not cross the walking route.
- Place a firm side surface on the non-exit side.
- Use a lidded drink container with an easy grip.
- Reduce the number of monitors temporarily.
Questions to Ask Before Buying Equipment
- Will this item remain stable during a sit-to-stand transfer?
- Does it change the chair height or hip position?
- Can it be returned if the therapist recommends a different size?
- Does the listed weight capacity include dynamic movement?
- Will it block the walker, crutches, or operated leg?
- Can it be cleaned easily if wound care or spills are a concern?
- Is assembly required, and who will assemble it before discharge?
- Is borrowing or renting more sensible for a temporary need?
When Professional Help May Be Worth the Cost
Ask about an occupational therapy or physical therapy assessment when transfers remain uncertain, the home has narrow routes, precautions are complex, or a caregiver is repeatedly lifting or steadying the patient.
A professional can evaluate seat height, mobility-aid clearance, adaptive equipment, fatigue, and task technique together. That can prevent spending money on isolated products that solve the wrong problem.
Key takeaway
Buy only after the setup reveals a specific problem. “I cannot stand safely from this height” is a buying reason. “Recovery offices usually have gadgets” is not.
Build a Return-to-Work Plan Your Employer Can Use
A useful return-to-work conversation focuses on function. Your manager usually needs to understand what duties can be completed, what temporary changes are requested, and when the arrangement should be reviewed.
Request Functional Changes, Not a Full Medical Story
- Reduced or gradually increasing hours
- Flexible start and finish times
- Longer gaps between meetings
- Camera-optional calls
- Written updates instead of some live meetings
- Remote access to essential systems
- Temporary removal of lifting, travel, driving, or on-site duties
- Permission to attend therapy and follow-up appointments
Employment policies and accommodation processes differ. Ask human resources what documentation is required and avoid promising a fixed recovery date before the clinical team can support one.
Sort Duties Into Three Buckets
| Duty bucket | Meaning | Example |
|---|---|---|
| Safe now | Fits current clearance and can be completed without compromising recovery tasks | Short email review from the approved workstation |
| Possible with modification | Requires a schedule, equipment, location, or responsibility change | Video meeting shortened to 20 minutes with a movement buffer afterward |
| Defer | Conflicts with restrictions or exceeds current physical capacity | Client travel, lifting equipment, repeated stairs, or an on-site shift |
This framework gives the employer something concrete to act on. It also reduces the risk of accepting a vague “work from home” arrangement that still contains unsuitable duties.
Create a Fatigue Exit Plan
Decide before the workday begins what happens if pain, swelling, nausea, dizziness, medication effects, or exhaustion increase. Identify which meeting can be canceled, which deadline can move, and who should receive the update.
For a broader planning framework, the site’s remote work after surgery guide can help separate medical readiness from the simple availability of a laptop.
When Desk Adjustments Are the Wrong Fix
A workstation can solve poor reach, unstable equipment, and blocked routes. It cannot solve a postoperative complication. Do not keep adjusting the chair when the real issue is a concerning change in symptoms or function.
Contact the Surgical Team for Concerning Changes
Follow your discharge instructions regarding worsening pain, increasing swelling, wound drainage, fever, a fall, new difficulty bearing weight, new numbness or weakness, or a sudden decline in mobility. The exact contact threshold may differ by procedure and medical history.
Keep a short record of what changed, when it began, what you were doing, and whether function changed. This guide on describing pain to an orthopedist can help organize the message without trying to diagnose the cause yourself.
Recognize Possible Blood-Clot Warning Signs
New leg swelling, redness, tenderness, or calf pain needs prompt medical assessment for a possible blood clot. Shortness of breath, chest pain or pain with breathing, coughing blood, or fainting can signal pulmonary embolism and require immediate emergency help. Do not wait until symptoms are severe or drive yourself. CDC blood-clot warning signs.
Do Not Ignore Medication Effects
Prescription pain medicine and other postoperative medications may affect alertness, judgment, balance, reaction time, or concentration. Follow prescribing instructions and workplace safety rules, especially when work involves financial approvals, confidential decisions, driving, machinery, or responsibility for another person.
Do not change medication timing to fit meetings without discussing it with the prescribing clinician. The calendar should bend before the care plan does.
FAQ: Working From Home After Hip Surgery
When can I work from home after hip surgery?
The timing depends on the procedure, surgical approach, medical history, complications, job duties, medication use, mobility, and clinician clearance. Working from home may remove commuting but still requires safe sitting, transfers, concentration, and enough energy to complete rehabilitation activities.
How long can I sit after hip surgery?
Use the sitting and movement guidance in your discharge plan. There is no single timer that fits hip replacement, arthroscopy, fracture repair, and soft-tissue procedures. Ask what position changes are recommended and whether sitting time should be limited or interrupted.
Can I use my regular office chair?
Possibly, but test its seat height, firmness, armrests, wheel movement, swivel, and transfer stability. A chair that works well for ordinary ergonomics may be too low, mobile, or soft during early recovery.
Are rolling office chairs safe after hip surgery?
A rolling chair can move during a transfer, even when some casters are locked. Prefer a stable chair unless a physical or occupational therapist has evaluated the chair and transfer method for your situation.
Can I work from a recliner?
A recliner may be suitable when the height, firmness, controls, leg position, and transfer method match your instructions. Confirm that the foot section does not block the walker and that you can return the chair to an exit position without twisting or straining.
Should I use a footrest?
Only when it supports the position recommended by your care team and does not obstruct standing. Ordinary ergonomic foot support is not the same as medically prescribed elevation, which may require a particular height, position, or schedule.
Can I use a standing desk?
Standing requires appropriate weight-bearing status, balance, endurance, and safe mobility-aid placement. Ask the rehabilitation team before treating a standing desk as an alternative to sitting.
Where should I keep my walker while working?
Keep it within reach before standing, without blocking the operated leg or exit route. Do not use it as a table or place bags on it that could alter its balance.
Can I work while taking prescription pain medication?
That depends on the medication, side effects, job duties, prescribing guidance, and workplace rules. Discuss concerns about concentration, alertness, balance, decision-making, or safety-sensitive work with the prescribing clinician and employer.
Run the 15-Minute Workstation Rehearsal
Use the planning time to inspect the chair, clear the route, arrange equipment, and check your instructions. A full transfer or work rehearsal should occur only when already permitted and with the prescribed assistance. Do not test a rolling chair or difficult transfer by putting your recovering body at risk. Ask the therapist to assess unresolved safety concerns.
Complete the Full Cycle
- Walk from the usual resting area to the workstation.
- Position the walker, crutches, or cane for the approved transfer.
- Sit using the technique taught by the care team.
- Type, use the mouse, answer the phone, and reach for water.
- Simulate a video call and check whether the headset or controls require twisting.
- Stand after several minutes rather than immediately.
- Leave the workstation and walk toward the bathroom route.
Record Three Friction Points
Write down anything that causes instability, restricted movement, difficult reaching, a blocked path, or dependence on furniture that was not designed to support body weight. Keep the list factual:
- “The chair rolled backward when I pushed on the armrest.”
- “The mouse requires me to lean beyond the chair back.”
- “The walker does not fit between the desk and the wall.”
- “The recliner control is on the operated side and requires twisting.”
- “After ten minutes, standing is less controlled than sitting down.”
Fix the Layout Before Shopping
First move the desk, remove clutter, reroute cords, enlarge text, center the monitor, and shorten the planned work block. Buy or borrow equipment only for the problems that remain.
Bring unresolved transfer, posture, equipment, or mobility-aid problems to the physical or occupational therapist. A five-minute demonstration can reveal more than a page of product specifications.
Your next 15 minutes
Check the empty workstation and take unresolved transfer or posture questions to your therapist. During ordinary, approved use, record difficulties without adding repeated sitting, standing, reaching, or walking trials. Feeling comfortable does not override restrictions.
Last updated: October 14, 2026
Targeted editorial update: October 21, 2026. Added a topic-specific record, question and follow-up guide and revised the title and search description. Existing useful material was retained; this update is not a complete medical, legal or insurance review. Confirm individual instructions, current prices and benefits with the relevant service.