

Orthopedic visit prep
How to Describe Pain Location to an Orthopedist
Without Wasting the Visit
Pain has a strange talent for becoming vague the moment a clinician asks, “Where exactly does it hurt?” At home, you know the spot. In the exam room, under bright lights and paper-table crinkles, the whole story can collapse into: “It hurts… around here.”
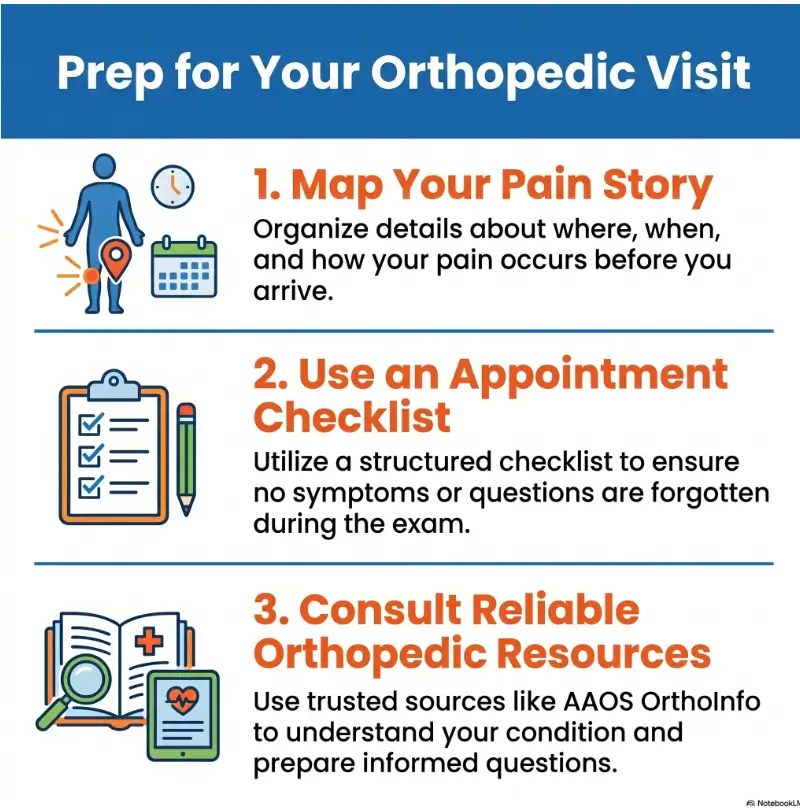
This guide helps you turn that fog into a usable map. You will learn how to name the exact location, describe whether pain travels, connect it to movement, explain nerve-like symptoms, and bring the details that help an orthopedist understand the problem faster.
It is not a diagnosis guide. It is a communication guide. The goal is simple: walk into the appointment with a clear, calm pain story so the visit does not become a scavenger hunt with co-pays.
Pinpoint the spot
Use one-finger location language instead of broad body-part guesses.
Explain the pattern
Describe travel, timing, triggers, relief, and what daily task is now harder.
Know the red flags
Separate appointment prep from symptoms that need prompt medical care.
Bring a map, not a monologue: the best pain description is short, specific, and connected to function. 🦴
Snapshot
This article is for adults preparing for an orthopedic appointment, caregivers helping someone explain pain, and second-opinion patients who want a cleaner symptom story. You will learn how to describe pain location, travel pattern, timing, triggers, nerve symptoms, and function loss so the visit starts with useful details instead of guesswork.
Table of Contents
Before You Act: When Pain Details Are Not Enough
A good pain description can make an orthopedic visit more productive, but it should never replace medical judgment. Some symptoms belong in urgent care, the emergency department, or a prompt call to a qualified clinician instead of a neatly organized appointment note.
Use this article to prepare your words, not to label your injury. Your orthopedist may still need an exam, imaging, physical therapy history, medication review, or referral to another specialist depending on what they find.
When this becomes urgent, not “wait and see”
Seek prompt medical care if pain follows a significant injury and the joint looks deformed, you cannot use the limb, swelling appears suddenly, or pain is severe. Joint pain with fever, redness, warmth, or marked tenderness also deserves timely medical attention.
Back or neck pain with new weakness, numbness, trouble walking, loss of bladder or bowel control, fever, or major trauma should be treated seriously. Those details are not small side notes. They are the smoke alarm in the hallway.
Key takeaway
If pain comes with deformity, sudden swelling, fever, spreading redness, inability to bear weight, new weakness, numbness, or bladder or bowel changes, prioritize medical care over appointment-prep perfection.
What this guide can and cannot do
This guide can help you describe pain location, timing, triggers, and function loss in plain English. It can also help you avoid common communication mistakes, such as talking only about an MRI result while forgetting to explain what your body actually feels during stairs, sleep, work, or exercise.
It cannot tell you whether you have arthritis, a tear, tendon irritation, nerve compression, fracture, infection, or another condition. Those answers require a clinician who can examine you and decide what testing or treatment makes sense.
A note for caregivers and second-opinion patients
If you are helping a parent, spouse, athlete, or child prepare, resist the urge to write a courtroom brief. The most useful note is usually short: exact spot, side, travel pattern, start date, trigger, relief, and what normal activity has changed.
For second opinions, bring prior imaging reports and treatment history, but do not let the paperwork crowd out the lived symptom story. The doctor still needs to know what hurts today, where it hurts, and what it prevents you from doing.
The Pain Map Orthopedists Actually Need
The phrase “my knee hurts” is the front door, not the full house tour. An orthopedist needs to know whether the pain is on the inside of the knee, behind the kneecap, at the outside joint line, below the kneecap tendon, or in the back of the knee.
That level of detail helps the visit move from vague territory to useful clinical conversation. You are not trying to sound medical. You are trying to be findable.
Start with one finger, not a weather report
When the clinician asks where it hurts, point with one finger first. Not your whole hand. Not a sweeping gesture over the entire leg. One finger is the little lighthouse that tells the doctor where to begin.
After that, describe the wider area if needed. For example: “The worst spot is on the inside of my right knee, just below the kneecap. Sometimes it spreads toward the shin after stairs.”
Name the side, surface, and depth
Use simple location words: right, left, front, back, inside, outside, top, bottom, surface, deep, joint line, muscle, tendon, bone, or nerve-like. You do not need perfect anatomy. Plain location language is often better than borrowed medical vocabulary used uncertainly.
Try this: “It feels deep in the front of my left hip, closer to the groin than the outside of the hip.” That is much more useful than “my hip area is weird.”
One-finger pain map checklist
- Which side: right, left, or both?
- Which surface: front, back, inside, outside, top, or bottom?
- How deep: surface-level, deep joint, muscle, tendon, bone-like, or nerve-like?
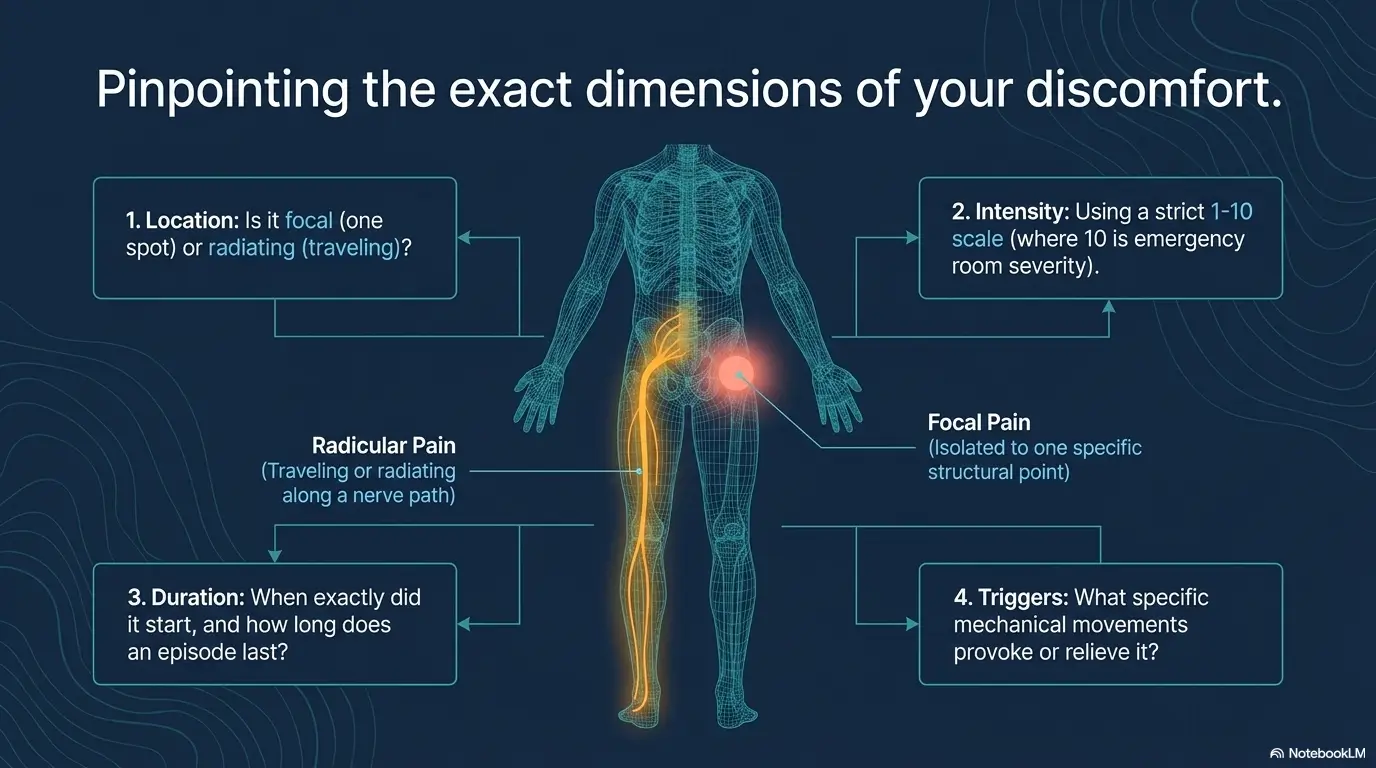
- Does it stay there, spread, shoot, wrap, or travel down the limb?
- What movement reliably wakes it up?
Here’s what no one tells you about “nearby” pain
Pain near a joint may not always come from that joint. Hip problems can feel like groin pain. Neck problems can travel into the arm. Low-back problems can travel into the buttock, thigh, calf, foot, or toes.
This is why travel pattern matters. Do not simply say, “It hurts around my leg.” Say where it starts, where it travels, and whether the travel feels sharp, burning, electric, aching, numb, or weak.
The 5-Part Pain Map Framework
1. Pinpoint
Point to the worst spot with one finger.
2. Side
Name right, left, front, back, inside, or outside.
3. Quality
Use words like sharp, dull, burning, aching, or electric.
4. Travel
Say whether it spreads, shoots, wraps, or stays put.
5. Trigger
Connect it to stairs, lifting, typing, sleep, walking, or rest.
The One Sentence That Changes the Visit
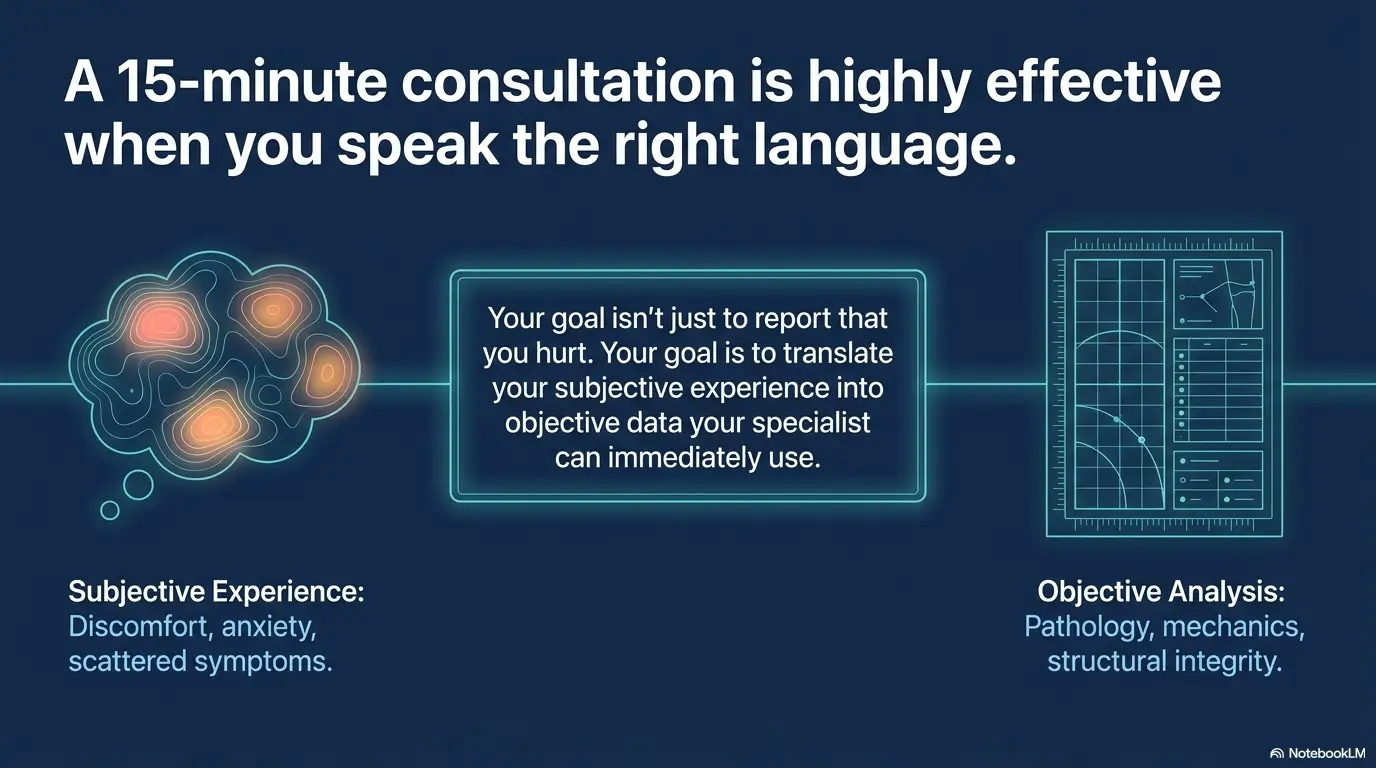
You do not need a dramatic speech. In many appointments, one clear sentence can do more than five minutes of wandering explanation.
Use this formula: “My pain is in [exact spot], on the [right/left], it feels [sharp/dull/burning], and it gets worse when I [movement/activity].”
Use the formula before the story
Start with the clean sentence first. Then add context. This keeps the appointment from opening with a long backstory about a garage step, a dog leash, a hotel mattress, and the mysterious Tuesday when everything began to creak.
Example: “My pain is on the outside of my right shoulder, it feels sharp when I reach overhead, and it sometimes aches down toward my upper arm at night.”
Add the travel pattern
Travel pattern is the route your pain takes. It may stay in one place, spread outward, shoot down, wrap around, or move between areas.
Useful phrases include “starts in my low back and shoots into my left calf,” “wraps around the outside of my hip,” “stays behind the kneecap,” or “travels below the elbow into my fingers.”
Say what your finger cannot show
Your finger can show location. It cannot show numbness, tingling, weakness, clicking, catching, locking, instability, swelling, warmth, or loss of motion.
Say those words early. “I also have tingling in the outside of my foot” is not decoration. It may change the questions your clinician asks next.
Key takeaway
Lead with one sentence: exact spot, side, pain quality, and trigger. Then add travel pattern and function loss. This keeps the appointment focused without making you sound rehearsed.
Pain Quality: Words That Help Without Diagnosing Yourself
Pain quality is the flavor of the symptom. It gives the orthopedist clues without forcing you to play doctor. Your job is not to say what structure is injured. Your job is to describe what the sensation feels like in your own body.
Think of this section as a menu of honest words. Choose the ones that fit. Leave the rest on the plate.
Sharp, dull, burning, aching, stabbing, electric
Sharp pain may show up with a specific movement. Dull or aching pain may linger after activity. Burning, tingling, or electric sensations may be important if they travel down an arm or leg.
Do not worry about using the “right” word. Use the closest plain-English description: “It feels like a hot wire,” “a deep toothache,” “a pinch,” “a pressure,” or “a zing.” Good clinicians can translate human language.
Pressure, catching, locking, giving way
For joints, function words matter. Catching, locking, popping, grinding, buckling, giving way, or feeling unstable may be more useful than another pain-scale number.
Try pairing the function word with a moment: “My knee catches when I turn in the kitchen,” or “My shoulder feels weak when I lift a plate into the cabinet.” That little kitchen detail can be surprisingly useful.
The “toothache in the bone” clue
Deep pain that wakes you at night, pain at rest, or pain that feels unusually intense should be described clearly. Do not soften it because you are afraid of sounding dramatic.
Say when it wakes you, where it wakes you, and what helps. For example: “It wakes me around 3 a.m. on the outside of the hip, and changing sides helps for about twenty minutes.”
| Pain word | How to say it clearly | Extra detail to add |
|---|---|---|
| Sharp | “A sharp pain on the inside of my knee” | Which motion causes it? |
| Burning | “Burning down the back of my leg” | Does it travel below the knee? |
| Aching | “A deep ache in the front of my shoulder” | Is it worse at night or after use? |
| Electric | “Electric zaps into my fingers” | Which fingers or side of the hand? |
| Locking | “My knee locks when I squat” | Does it unlock on its own? |
| Giving way | “My ankle gives way on uneven ground” | Any falls or near-falls? |
Movement and Timing: The Body’s Little Lie Detector
Pain location tells the orthopedist where to look. Movement and timing tell them how the problem behaves.
This is where many patients accidentally hide the best clues. They remember the pain number but forget the stairs, the steering wheel, the keyboard, the suitcase, the pickleball serve, or the sleepy twist out of bed.
Which motion wakes the pain?
List the specific movement that reliably brings symptoms on: raising the arm overhead, reaching behind the back, gripping, kneeling, climbing stairs, pushing off, bending, twisting, turning in bed, walking downhill, or sitting longer than thirty minutes.
Be practical. “It hurts when I exercise” is broad. “It hurts when I push off my right foot during a lunge” is a clean little clue with shoes on.
What makes it better?
Relief matters too. Tell the orthopedist whether rest, ice, heat, walking, stretching, medication, changing shoes, bracing, lying down, or avoiding certain motions helps.
Also mention what does not help. “Ice does nothing, but a short walk helps” is more useful than “I tried some stuff.”
What makes it worse the next day?
Some pain is not loud during the activity. It sends the bill later. Delayed pain after yardwork, travel, lifting, long sitting, running, or a work shift can be more revealing than pain during the event itself.
Track the next-day pattern for a week if you can. It does not need to be elegant. A few phone notes are enough: “Tuesday stairs, Wednesday worse behind kneecap.” Tiny breadcrumbs, big value.
Use the three-date method
Prepare three dates before the visit: when it started, when it got worse, and when it began limiting normal life.
If you do not know exact dates, use approximations: “early March,” “about two weeks after the fall,” or “after I started the new warehouse shift.” Realistic timing is better than a confident guess.
Key takeaway
Do not describe pain as a still photo. Describe it as a short movie: what starts it, what worsens it, what helps it, and what happens the next day.
Related Guides for Your Orthopedic Visit
Body-Part Cheat Sheet for Pain Location
Different body parts need different location language. You do not need to memorize anatomy, but a few accurate phrases can sharpen the appointment quickly.
Use the cheat sheet below as a starting point. Choose the phrases that match your body, not the ones that sound impressive.
Knee: front, inside, outside, back, below kneecap
Useful knee phrases include “inside joint line,” “outside of the knee,” “behind the kneecap,” “back of the knee,” “below the kneecap,” or “around the kneecap tendon area.”
Add the trigger: stairs, squatting, kneeling, standing up from a chair, walking downhill, pivoting, or getting out of a car.
Shoulder: front, top, outside, shoulder blade, down the arm
For shoulder pain, mention whether it is in the front, top, outside of the upper arm, shoulder blade area, or traveling below the elbow. Also describe overhead pain, reaching behind your back, sleeping pain, weakness, clicking, or loss of range of motion.
A useful example: “The pain is on the outside of my right shoulder, worse when I reach overhead, and it wakes me when I lie on that side.”
Hip, back, neck, foot, and ankle
Hip pain can show up as groin pain, outside hip tenderness, buttock pain, or thigh pain. Back and neck pain should include whether symptoms travel into the arm, hand, buttock, thigh, calf, foot, fingers, or toes.
For foot and ankle pain, name the heel, arch, ball of the foot, toes, inside ankle, outside ankle, or Achilles area. Add whether pain is worst on first steps, during push-off, after running, in certain shoes, or while standing still.
| Body part | Better location phrase | Trigger to mention |
|---|---|---|
| Knee | “Inside of my right knee, near the joint line” | Stairs, squats, kneeling, pivoting |
| Shoulder | “Outside of my upper arm near the shoulder” | Overhead reaching, sleeping, lifting |
| Hip | “Deep in the groin” or “outside hip tenderness” | Walking, stairs, lying on side, getting into car |
| Low back | “One side of my low back, traveling into the calf” | Sitting, bending, walking, coughing, standing |
| Neck | “Base of neck, traveling into shoulder and fingers” | Computer work, turning head, sleeping position |
| Foot/ankle | “Heel,” “arch,” “ball of foot,” or “outside ankle” | First steps, shoes, running, push-off, uneven ground |
Show me the nerdy details
Orthopedic location language often works in layers. First comes the body region: shoulder, knee, hip, neck, back, foot, or ankle. Next comes the surface: front, back, inside, outside, top, or bottom. Then comes depth: surface tenderness, deep joint pain, muscle ache, tendon-area pain, or nerve-like symptoms.
The next layer is behavior. Mechanical pain may appear with a specific movement or load. Irritated tissue may ache after use. Nerve-like symptoms may travel, tingle, burn, or feel electric. These patterns do not diagnose the condition by themselves, but they help your clinician choose better questions and examine the right area.
The final layer is function: what you cannot do now that you could do before. Function turns a symptom into a clinical priority.
What to Bring So the Visit Does Not Become Guesswork
A productive orthopedic visit does not require a binder thick enough to stop a door. It needs the right few details, cleanly organized.
Your goal is to help the orthopedist see the pattern quickly: where pain is, when it started, what triggers it, what helps, what treatments you tried, and what daily task has changed.
A two-minute symptom note
Bring a short note on paper or your phone. Include exact location, start date, injury or no injury, triggers, relief, prior injuries, treatments tried, and the main activity you cannot do normally.
Keep it short enough that a clinician can scan it while walking into the room. A clear paragraph beats a six-page diary unless you were specifically asked to track symptoms in detail.
Photos, videos, and reports can help
A photo of swelling, bruising, redness, posture, shoe wear, or a short video of the painful movement may help when symptoms disappear in the exam room. Keep videos brief and safe. Do not perform a movement that could worsen your injury just to demonstrate it.
Bring prior X-ray, MRI, CT, ultrasound, surgery, injection, or physical therapy reports when available. If you have access to images on a portal or disc, ask the office ahead of time how they prefer to receive them.
Medication and treatment list
Write down what you have tried: anti-inflammatory medicines, acetaminophen, topical creams, ice, heat, braces, splints, injections, physical therapy, chiropractic care, massage, rest, exercises, shoe changes, or activity changes.
Include what helped, what did nothing, and what made symptoms worse. This can prevent wasted money on repeat treatments that already failed.
Appointment prep card template
- Worst pain location: ____________________
- Side and surface: ____________________
- Started: ____________________
- Feels like: ____________________
- Travels to: ____________________
- Worse with: ____________________
- Better with: ____________________
- Daily task affected: ____________________
- Treatments tried: ____________________
- One question I need answered: ____________________
Tools, Costs, and Services Worth Comparing Before You Pay
Describing pain well can also save money. Not because good notes magically lower bills, but because clear information can reduce repeat appointments, confused follow-ups, unnecessary duplicate purchases, and tools that do not fit your actual problem.
Before buying braces, supports, cushions, ice wraps, ergonomic gear, paid apps, imaging, or out-of-network consultations, compare what you need, what the clinician recommends, and what your insurance may or may not cover.
Free prep is enough for many visits
For a first orthopedic appointment, a simple phone note is often enough. You can create a pain map, symptom timeline, treatment list, and question list without paying for an app or fancy tracker.
Paid tools may be worth considering if you manage multiple conditions, care for an older parent, track workers’ compensation documentation, coordinate with several specialists, or need a clean history over months.
Braces, supports, and home comfort items
Many readers search for the best knee brace, wrist splint, lumbar cushion, shoulder sling, ice wrap, or walking aid before the appointment. Sometimes that is reasonable. Sometimes it creates a drawer full of almost-right objects that never earn their rent.
If pain is new, severe, worsening, or linked to injury, ask the clinician what type of support fits your situation before spending much. A low-cost temporary option may be enough for comfort, while a more specific brace may need professional fitting or guidance.
Questions to ask before paying for extra services
If you are considering physical therapy, imaging, injections, a second opinion, a cash-pay appointment, or an out-of-network provider, ask practical money questions before you commit.
- What is the goal of this service?
- What would make it successful?
- What are the lower-cost alternatives?
- Is prior authorization needed?
- Is there a facility fee?
- Will this be billed as in-network or out-of-network?
- What should I do if symptoms worsen before the next visit?
| Option | Best for | Cost mindset | What to verify |
|---|---|---|---|
| Free phone note | Most first visits | No cost | Exact location, triggers, timing, function loss |
| Printed symptom worksheet | Caregivers, older adults, second opinions | Low cost | Easy to read, not overly long |
| Paid tracking app | Longer timelines, multiple symptoms, documentation needs | Compare monthly price | Export options, privacy, simplicity |
| Brace or support | Comfort or temporary support when appropriate | Start simple unless advised otherwise | Fit, return policy, clinician guidance |
| Second opinion | Unclear diagnosis, major treatment decision, persistent symptoms | Check network and self-pay cost | Records needed, imaging access, visit type |
Key takeaway
Before paying for tools or services, write the pain map first. Knowing the exact problem you are trying to solve makes every purchase, appointment, and provider question sharper.
Real-world example: the expensive brace drawer
A patient with knee pain buys three braces before seeing an orthopedist: one sleeve, one hinged brace, and one compression wrap. None feels right. At the visit, the actual complaint becomes clearer: the worst pain is behind the kneecap during stairs and after sitting, not instability on uneven ground.
The practical lesson is not “never buy braces.” It is “describe the job before buying the tool.” Pain location plus trigger helps you ask a better question: “Do I need support, compression, activity modification, physical therapy, or a different evaluation?”
FAQ
How specific should I be when describing pain location?
Be as specific as you honestly can. Point with one finger first, then describe the wider area if the pain spreads. “Inside right knee, just below the kneecap” is more useful than “my leg hurts.”
Should I say the pain score first?
You can mention it, but do not lead with only a number. “Seven out of ten” is more useful when paired with location and function: “inside right knee, worse on stairs, cannot squat.”
What if the pain moves around?
Say exactly that. Describe where it starts, where it travels, and whether the traveling pain feels sharp, burning, electric, aching, numb, or weak.
Should I mention old injuries?
Yes. Include old fractures, sprains, surgeries, sports injuries, falls, car accidents, repetitive work, prior injections, and prior imaging when relevant.
What if my pain only happens during one activity?
That is useful. Name the activity, the specific motion, how quickly pain starts, and how long it lasts afterward.
Should I bring imaging reports?
Yes, bring prior X-ray, MRI, CT, ultrasound, or surgery reports when available. Still describe the pain in your own words because imaging does not always explain every symptom.
How do I describe numbness versus pain?
Use separate words. Pain may be sharp, dull, aching, or burning. Numbness means reduced sensation. Tingling may feel like pins and needles, buzzing, or electricity.
What should I say if I cannot find the exact spot?
Say, “I cannot pinpoint it, but it feels deepest around…” Then describe the nearest joint, muscle group, or movement that triggers it.
Make a 15-Minute Pain Map Before the Appointment
Here is the calm finish: you do not need to become a medical expert before seeing an orthopedist. You need a short, honest map.
Set a timer for fifteen minutes. Write one sentence, add one function loss, list what you tried, and bring it on paper or your phone. That is enough to rescue the most important details from exam-room amnesia, that tiny gremlin with excellent timing.
The final template
Use this sentence before your visit: “My pain is in ___, on the ___ side, started ___, feels ___, travels ___, and gets worse when ___.”
Then add one daily-life impact: walking, sleeping, stairs, driving, typing, lifting, dressing, exercising, cooking, caregiving, or working.
Your 15-minute next step
Before the appointment, write your pain-map sentence, then take one photo or short note that shows the problem in real life: stairs, shoes, swelling, sleep position, desk setup, or the movement that triggers symptoms.
Bring that note to the visit. Clear words will not solve everything, but they can turn the first few minutes from fog into a usable trail.
Last reviewed: 2026-07